With the constant evolution of cyber threats, developers and organizations must adopt proactive measures to identify and mitigate vulnerabilities early in the development process.
This is where Dynamic Application Security Testing (DAST) becomes essential. Incorporating DAST ensures that your applications are thoroughly scanned for vulnerabilities in run-time.
By integrating DAST into Continuous Integration/Continuous Deployment (CI/CD) pipelines, developers can automate security testing, detect issues early, and streamline the deployment process without sacrificing security.
What is DAST and why does your organization need it?
Dynamic Application Security Testing (DAST) is an automated testing methodology designed to identify security vulnerabilities in web applications.
It simulates attacks on the application and analyzes the responses, differing from static testing, which examines the application’s code. Instead, DAST evaluates the application’s real-time functionality, making it a powerful tool for securing live web applications.
DAST operates using a black box testing approach, meaning it has no knowledge of the application’s internal architecture. Instead, it examines the application externally, just as a potential attacker would.
This methodology allows DAST to uncover vulnerabilities that other testing methods might miss, establishing it as a crucial component of a comprehensive security framework.
The primary objective of DAST is to identify potential security loopholes before malicious actors can exploit them. These vulnerabilities may include issues such as SQL Injection, Cross-Site Scripting (XSS), and other threats that could enable unauthorized access to sensitive data.
What are secure development practices?
Secure development practices refer to a set of methodologies, techniques, and guidelines designed to build software applications with strong security measures from the outset.
These practices are crucial for ensuring that software systems remain resilient to cyber threats and vulnerabilities throughout their lifecycle.
By following secure development practices, organizations can systematically identify and address potential vulnerabilities during every stage of the software development lifecycle, from conception to deployment and maintenance.
These practices encompass various aspects such as threat modeling, code review, input validation, authentication, secure communication, error handling, patch management, and security testing.
Implementing secure development practices not only protects applications against potential attacks but also instills confidence among users and stakeholders. This, in turn, fosters trust, enhances reputation, and ensures regulatory compliance.
What is Travis?
Travis CI is a pivotal component in modern software development workflows, providing developers with a seamless continuous integration (CI) and continuous deployment (CD) solution.
At its core, Travis CI automates the testing and deployment process for software projects, ensuring code stability and reliability with each commit and pull request. By automatically running tests and deploying applications to various environments, Travis CI empowers developers to catch issues early in the development lifecycle and maintain a high level of code quality.
Travis CI supports a wide range of programming languages and platforms, enabling teams to build and test applications written in JavaScript, Ruby, Python, Java, PHP, and more.
With parallel test execution, Travis CI optimizes build times by running tests concurrently, speeding up the feedback loop for developers.
How can you integrate DAST into your Travis CI/CD pipeline?
Continuous Integration (CI) is an essential practice in modern software development, ensuring that new changes are continuously tested and integrated.
In this tutorial, we’ll walk you through the steps to integrate Travis CI with Beagle Security, an automated penetration testing platform.
Step 1: Configure Travis CI for a generic language

First, we need to set up Travis CI to use a generic language. This is crucial for integrating custom scripts and tools that are not language-specific, such as Beagle Security.
Open your.travis.yml file in your project’s root directory.
Add the following line to specify a generic language:
language: generic
Step 2: Add the Beagle Security trigger script

Next, we need to add a script to trigger Beagle Security’s penetration testing during the CI build process.
- In the same.travis.yml file, add the following snippet under the script section:
script: curl --silent -L https://git.io/fjXpA | bash -
This command uses curl to fetch a script from a URL and then executes it using bash. This script will trigger Beagle Security’s penetration test.
Step 3: Generating access token in Beagle Security
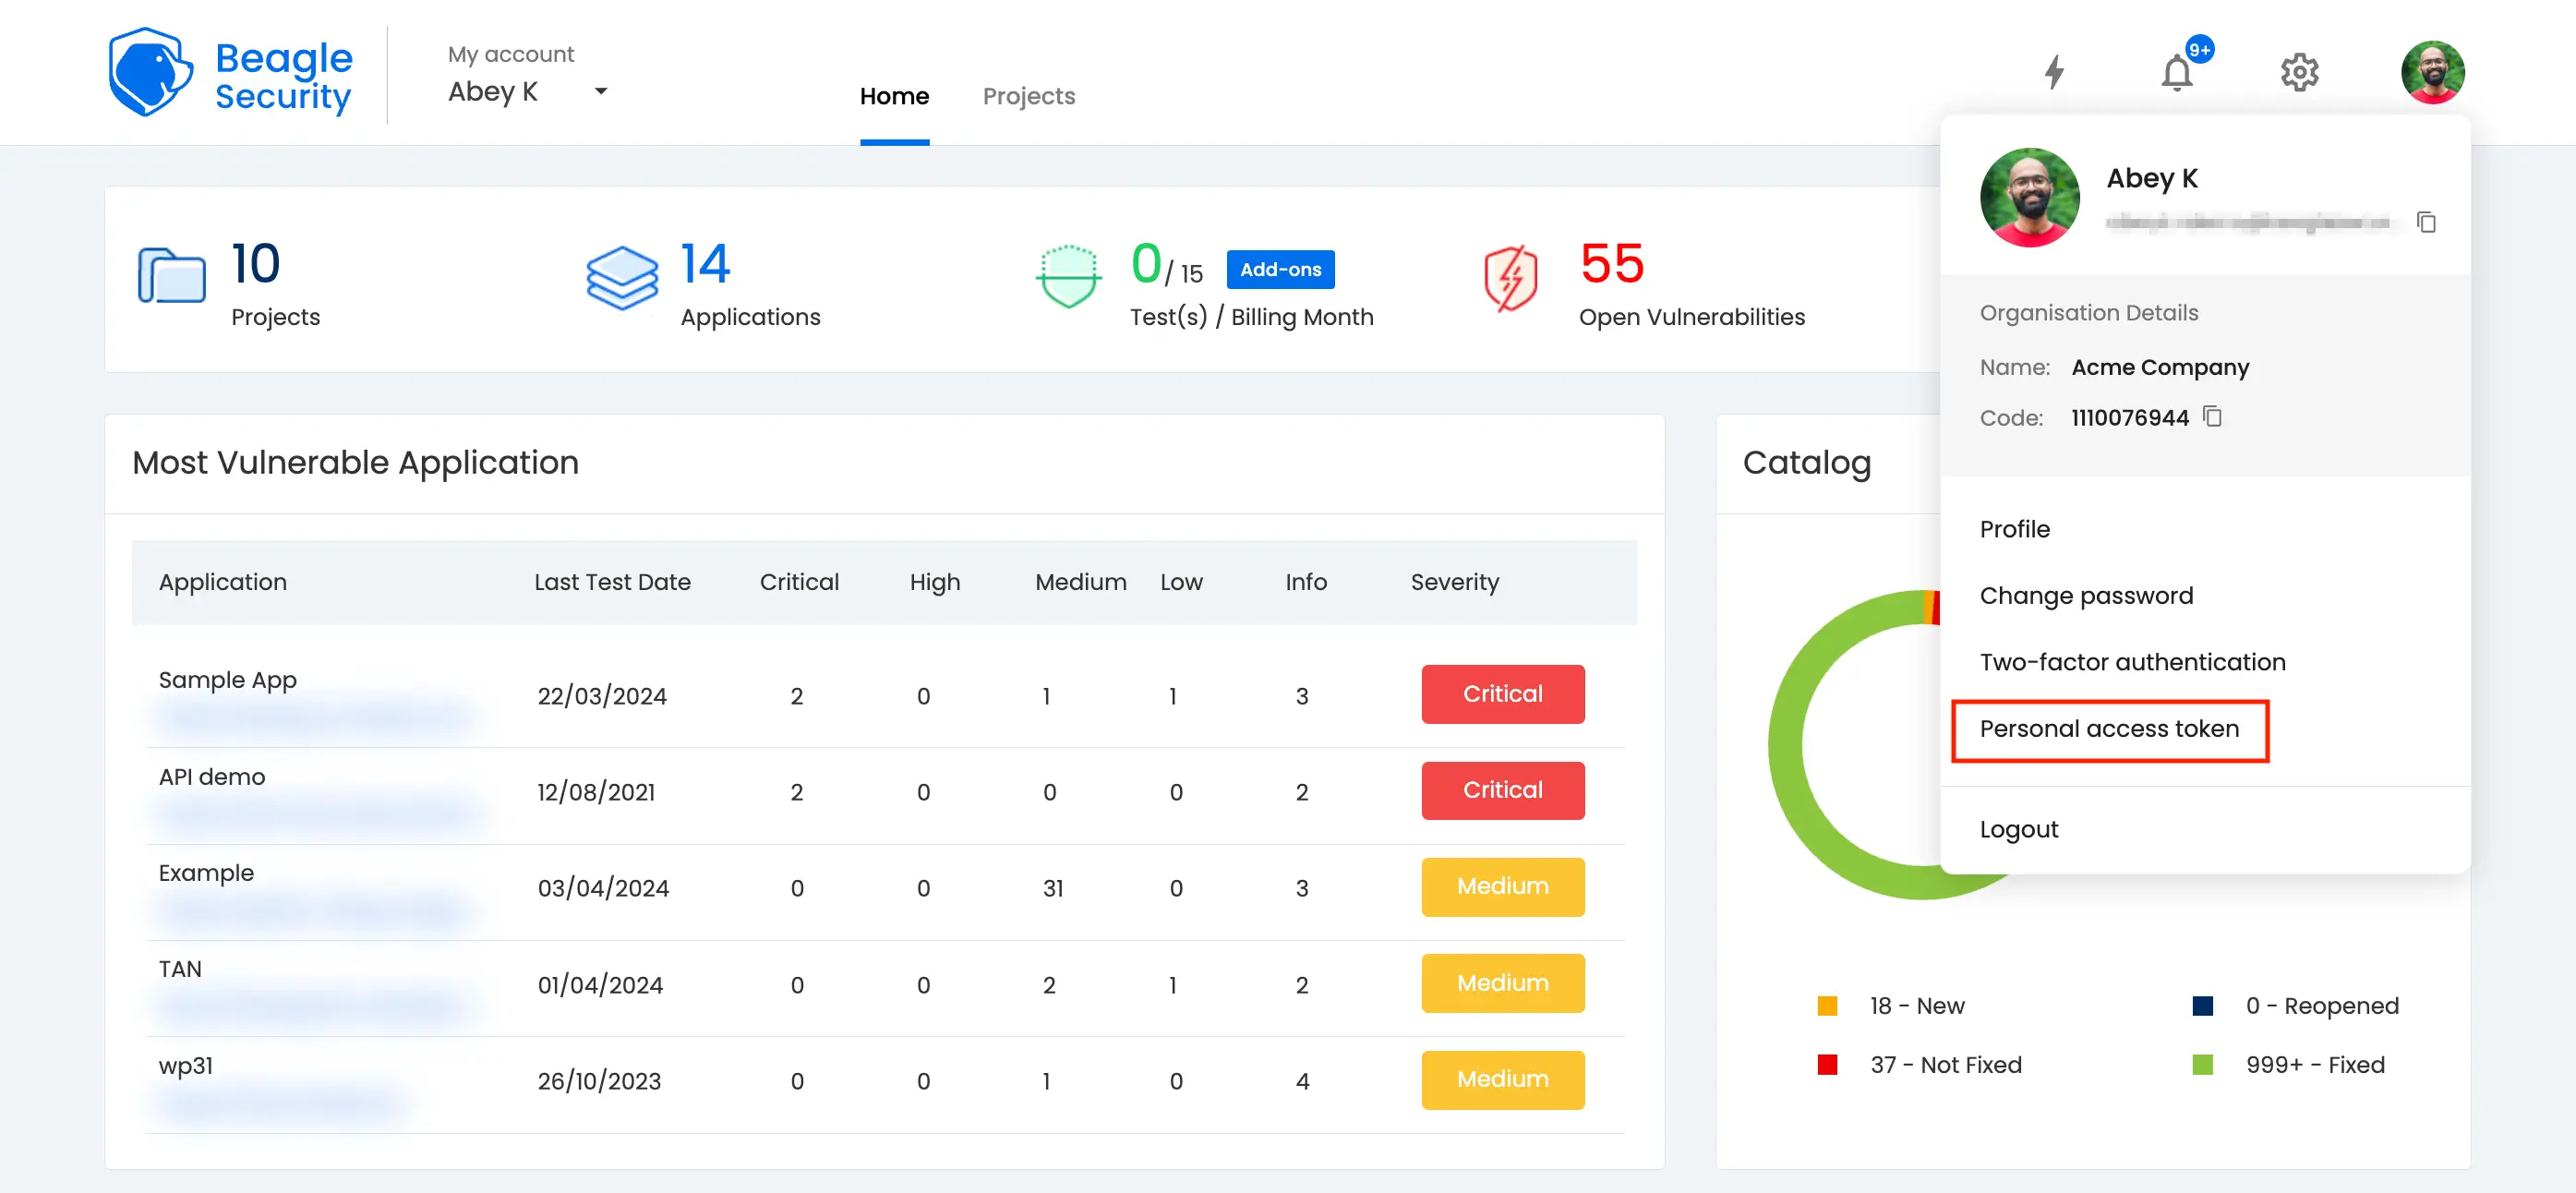
- You can locate personal access token from the profile drop-down menu.
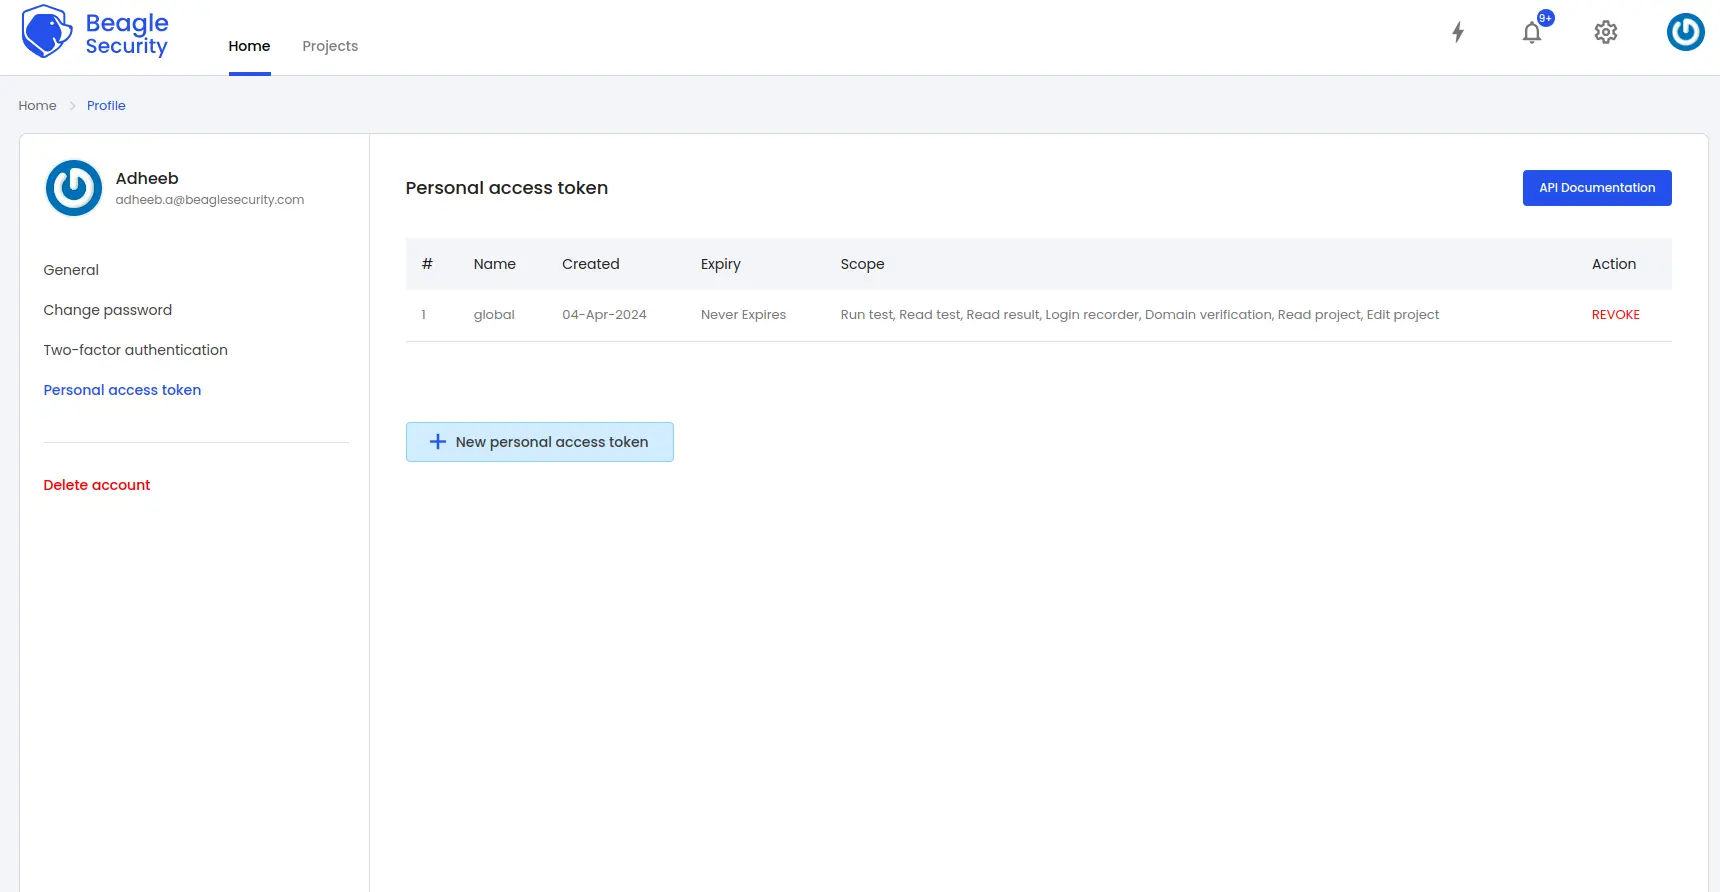
Click on the New personal access token button to generate a fresh token.
Name the access token and optionally set an expiry date.
Define the token’s scope based on your specific requirements.
Once created, you’ll receive a unique access token that can be copied for use.
Step 4: Where can you find the application token in Beagle Security?
- To get the application token, you must first add the URL as an application within Beagle Security.
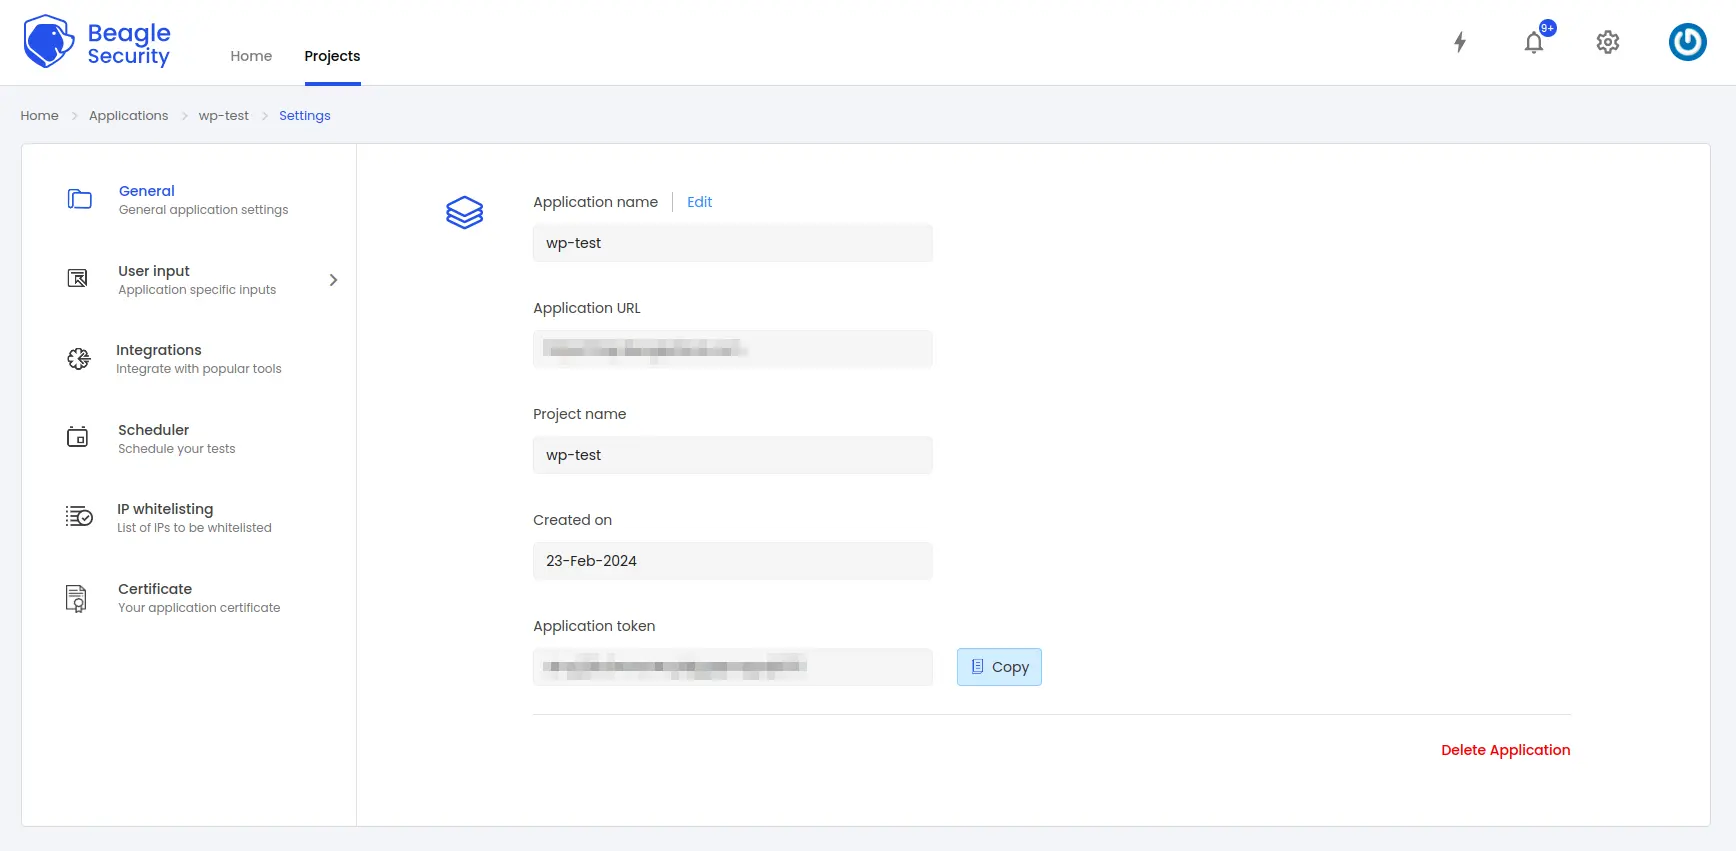
Go to the Application and navigate to its Settings.
Select the General tab.
You’ll be able to copy the application token for the specific application from there
Step 5: Set up environment variables in Travis CI

To securely pass your Beagle Security access and application tokens to the build process, we need to add these tokens as encrypted environment variables in Travis CI.
Login to Travis CI dashboard
- Go to Travis CI and log in with your GitHub account.
Select your repository
- Navigate to your list of repositories and select the repository you want to integrate with Beagle.
Go to repository settings
- Click on the “Settings” tab for the selected repository.
Navigate to environment variables
- Scroll down to the “Environment Variables” section.
Add your tokens
Add two new environment variables:
For the access token, set the name to
ACCESS_TOKENand enter your Beagle Security access token as the value.For the application token, set the name to
APPLICATION_TOKENand enter your Beagle Security application token as the value.
Make sure that the “Display value in build log” option is turned off to keep your tokens secure.
Step 6: Trigger a build

Now that your.travis.yml file is configured and the necessary environment variables are set, you can trigger a build to test the integration.
Push your changes
Commit and push your changes to the
.travis.ymlfile to your GitHub repository.git add .travis.yml git commit -m "Integrate Travis CI with Beagle for automated penetration testing" git push origin main
Monitor the build
- Go to the Travis CI dashboard and watch the build process. You should see that the build triggers and runs Beagle Security’s penetration tests as part of the script execution.
Step 7: Viewing vulnerabilities in Beagle Security after DAST
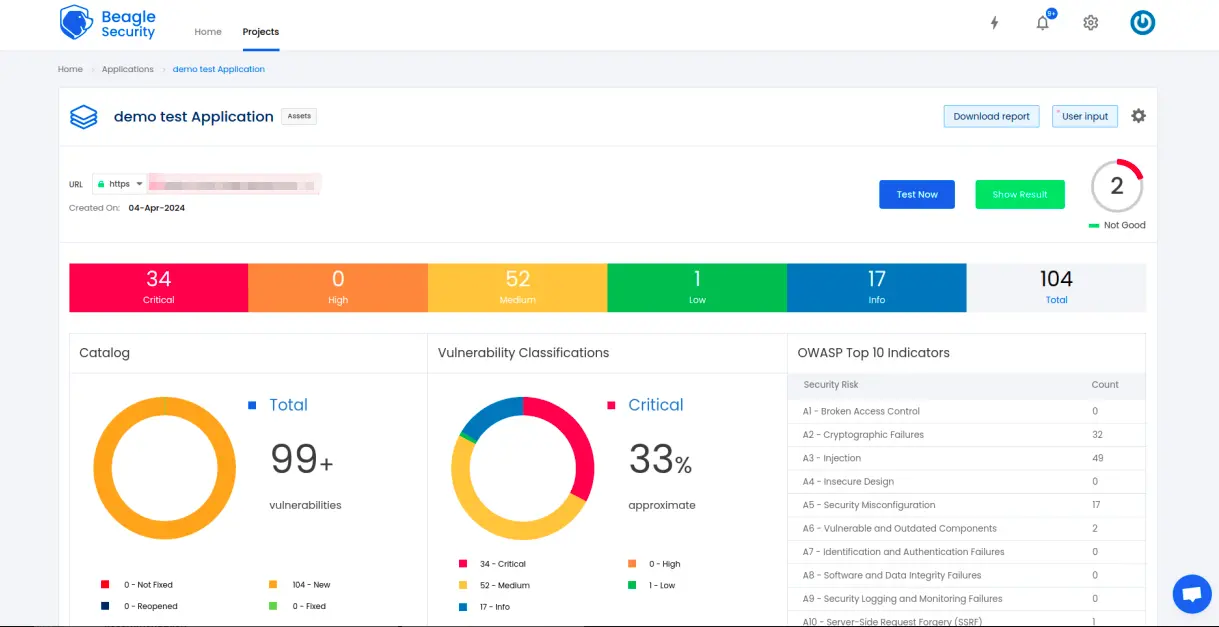
Once the DAST is completed for the Travis CI/CD pipeline, you can view the results from your Beagle Security dashboard.
You’ll be able to see the following details in the application dashboard:
Security score of the application
Vulnerability classification based on criticality
Graphs for vulnerability catalog & vulnerability classification
OWASP Top 10 indicator mapping
Security posture of the application over a period
Vulnerability fixing rate graph
Past test sessions
Check out a demo application dashboard in Beagle Security.
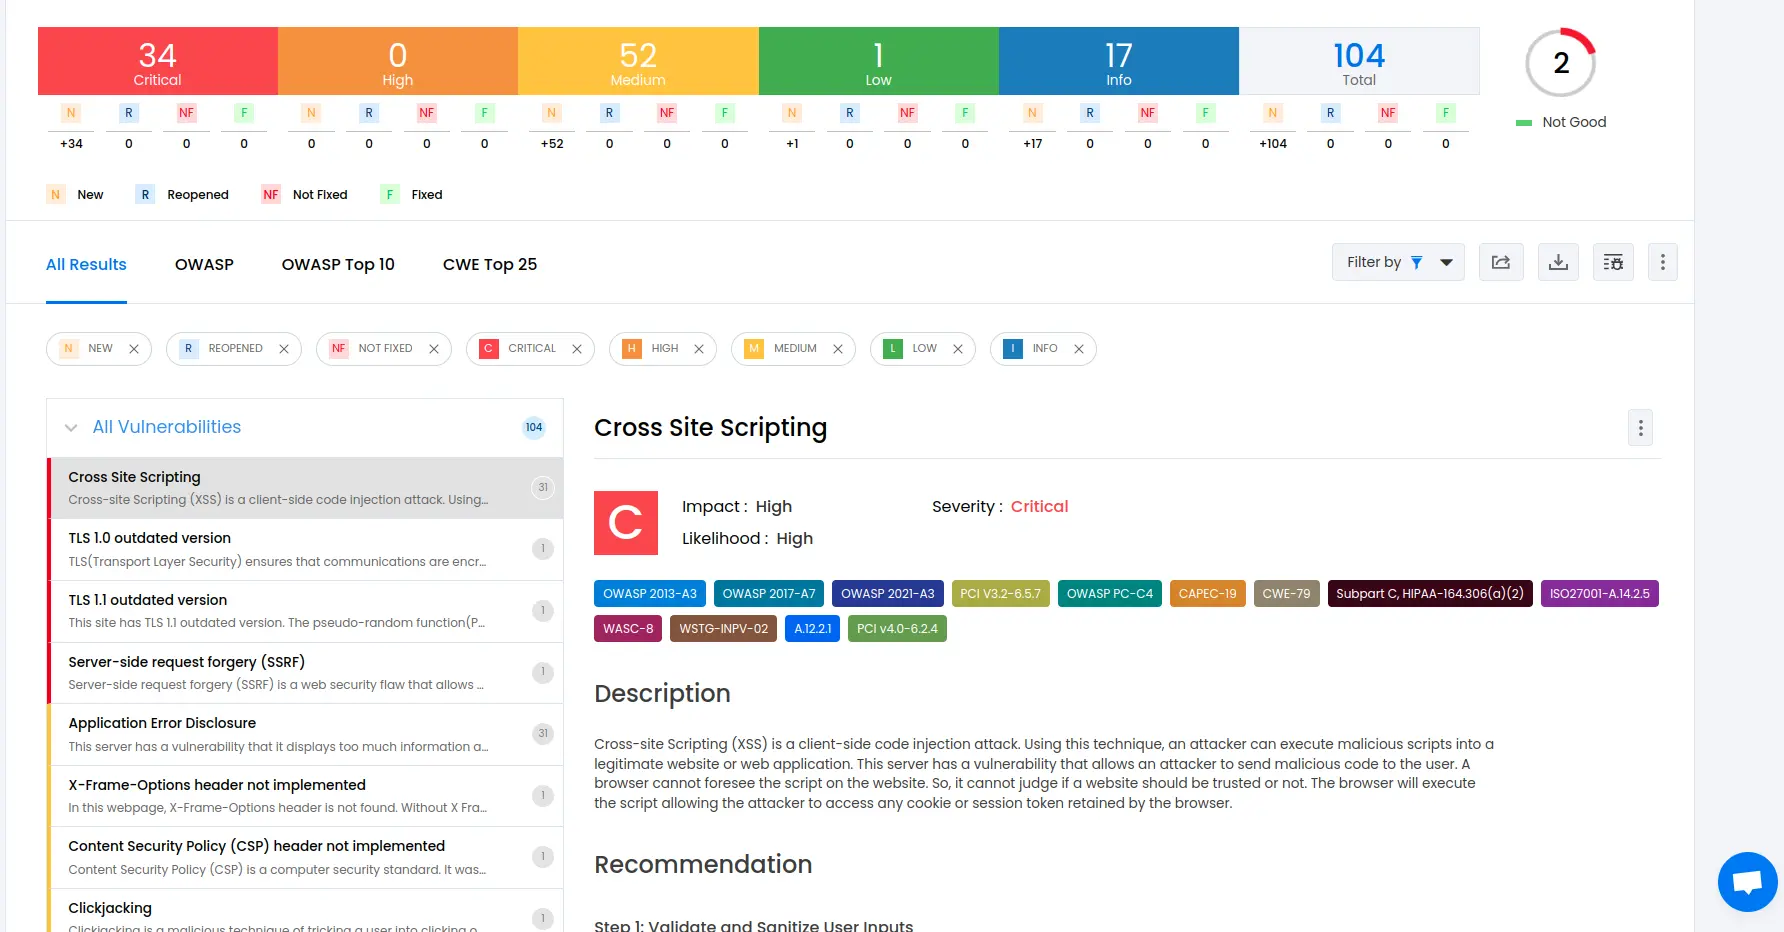
To delve deeper into the vulnerabilities, you can go to the detailed results dashboard of a particular test session. The results dashboard will include the following information:
Detailed listings of all vulnerability findings
Vulnerability tags and classification for each vulnerability finding against security standards
Detailed description, contextual recommendation, proof of exploit and occurrences of each vulnerability finding
Classification of vulnerability findings against OWASP, OWASP Top 10 & CWE Top 25
You can also download these results as PDF reports against OWASP, HIPAA, GDPR & PCI DSS standards
Check out a demo results dashboard in Beagle Security.
Summing up
In conclusion, integrating DAST into your Travis CI pipeline using the Beagle Security plugin can enhance the way you approach security testing for your web applications.
Incorporating automated security testing into your development workflow allows you to identify and address potential security vulnerabilities early in the development lifecycle. This proactive approach reduces the risk of security breaches and enhances the overall security of your applications.
Integrating Beagle Security with Travis CI streamlines the security testing process, providing developers with instant feedback on vulnerabilities directly within their familiar development environment. This setup facilitates timely resolution of security issues, enabling developers to iteratively enhance the security of their applications with every code change.
![Top 10 SDLC tools [2025] Top 10 SDLC tools [2025]](/blog/images/blog-banner-three-cover.webp)


![Best rated DAST tools [2025] Best rated DAST tools [2025]](/blog/images/top-rated-dast-tools-cover.webp)
