
In modern software development, Continuous Integration and Continuous Deployment (CI/CD) pipelines have become indispensable tools for ensuring efficiency, reliability, and security of code deployment processes.
However, while CI/CD pipelines excel at automating the build and deployment phases, they often lack comprehensive security testing. This gap can leave applications vulnerable to various cyber threats.
Dynamic Application Security Testing (DAST) is a crucial component in the arsenal of security testing methodologies. By simulating real-world attack scenarios, DAST tools help identify vulnerabilities in web applications during runtime. Integrating DAST into your CI/CD pipeline ensures that security testing is seamlessly woven into your development workflow, enabling early detection and remediation of vulnerabilities.
One powerful tool for integrating DAST into your GitHub CI/CD pipeline is the Beagle Security plugin. Beagle Security offers a comprehensive suite of security testing capabilities, including DAST, that seamlessly integrates with GitHub Actions.
In this guide, we’ll explore how to integrate DAST into your GitHub Actions CI/CD pipeline using the Beagle Security plugin. We’ll walk through the setup process and configuration options for incorporating DAST seamlessly into your development workflow.
What is DAST and how does it benefit your organization?
Dynamic Application Security Testing (DAST) is a type of security testing that assesses web applications by dynamically analyzing them while they are running.
Unlike static application security testing (SAST), which examines an application’s source code without executing it, DAST interacts with the running application to identify security vulnerabilities from the outside by mimicking the behavior of real attackers. This approach helps identify vulnerabilities that may not be apparent through other testing methods.
DAST can be integrated into CI/CD pipelines, enabling automated security testing throughout the development lifecycle. By incorporating DAST into the development workflow, organizations can identify and fix vulnerabilities early, reducing the risk of security breaches in production.
What do you mean by secure deployment?
Secure deployment refers to the process of deploying software or applications in a manner that minimizes security risks and vulnerabilities. It involves implementing various security measures and best practices to ensure that the deployment process itself does not introduce or exacerbate security issues.
One crucial aspect of secure deployment is thorough code review and testing before deployment. This involves static code analysis, dynamic application security testing (DAST), and manual code reviews by security experts to identify and address security vulnerabilities.
Additionally, another key consideration is secure communication between different components of the application and external systems. Implementing encryption protocols such as HTTPS/TLS ensures that communication channels are protected against eavesdropping and tampering.
How do you integrate DAST into your Github Action CI/CD automation?
GitHub Actions provides a robust framework for automating workflows based on various events within your GitHub repository.
One critical aspect of software development is ensuring the security of your applications, so integrating Beagle Security into your GitHub workflow can help achieve this goal seamlessly.
In this tutorial, we’ll walk through the steps to add Beagle Security to your GitHub Actions workflow, allowing you to automate security testing and ensure the integrity of your codebase.
Step 1: Generating access token in Beagle Security
- You can locate your personal access token from the profile drop down menu.
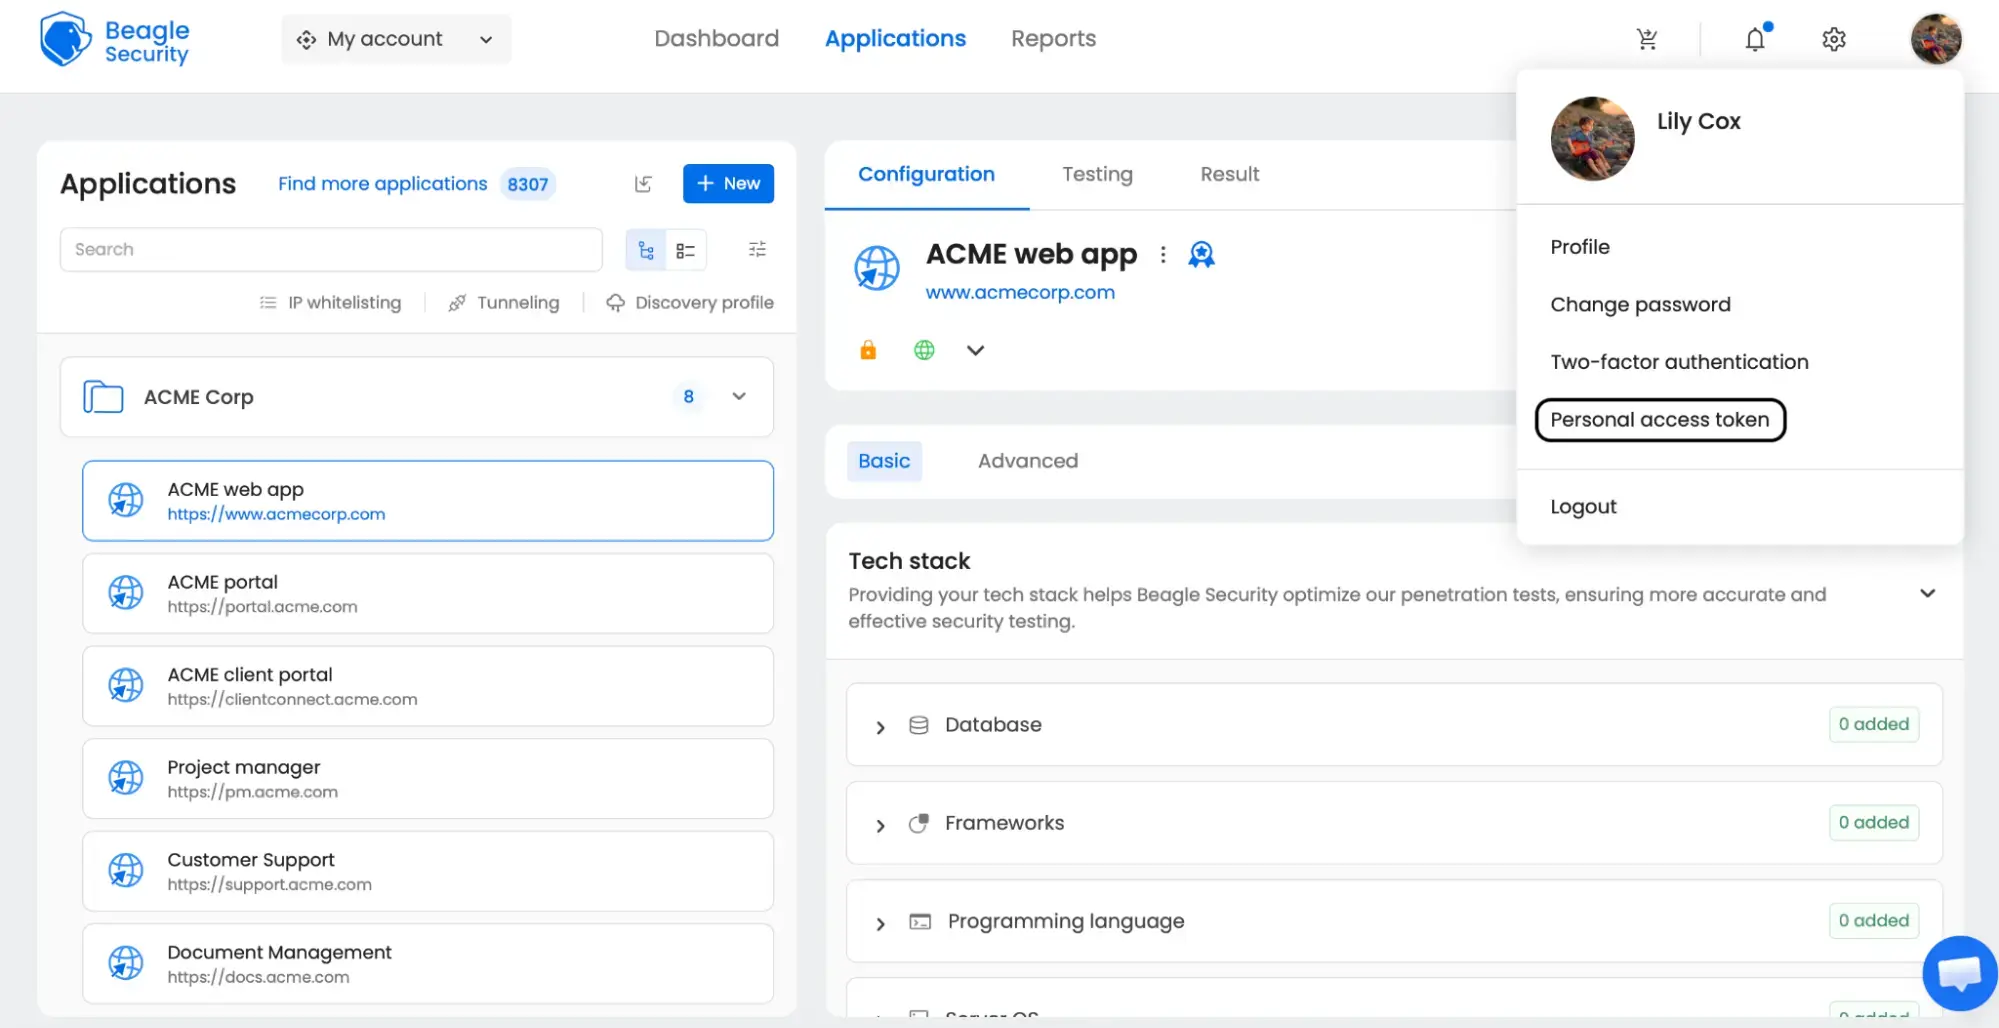
Click on the New personal access token button to generate a fresh token.
Name the access token and optionally set an expiry date.
Define the token’s scope based on your specific requirements.
Once created, you’ll receive a unique access token that can be copied for use.
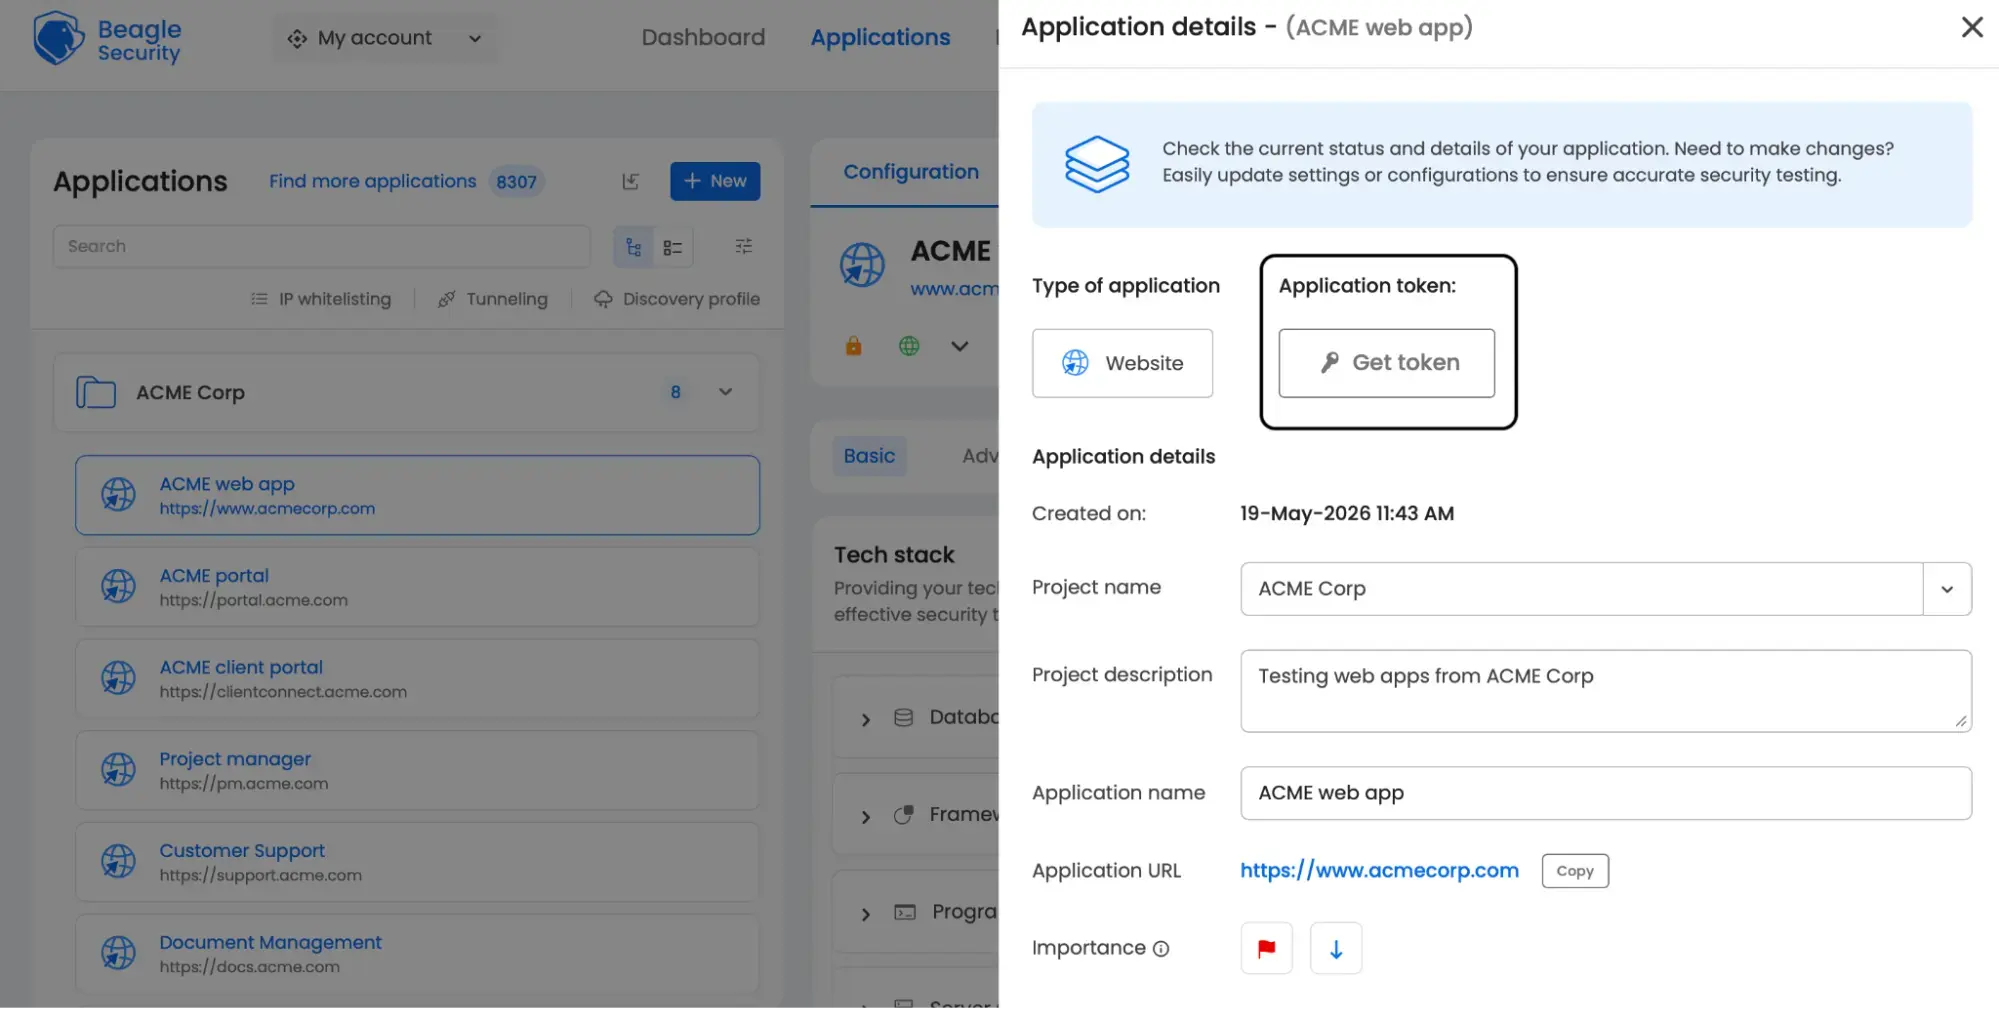
Step 2: Where can you find the application token in Beagle Security?
To find your application token, go to the applications section in your dashboard.
Select the specific application for which you want to generate a token.
Click on the paperclip/pen icon next to the application name to view its details.
In the application details view, click on the Get token button (displayed with a key icon) under the Application token label.
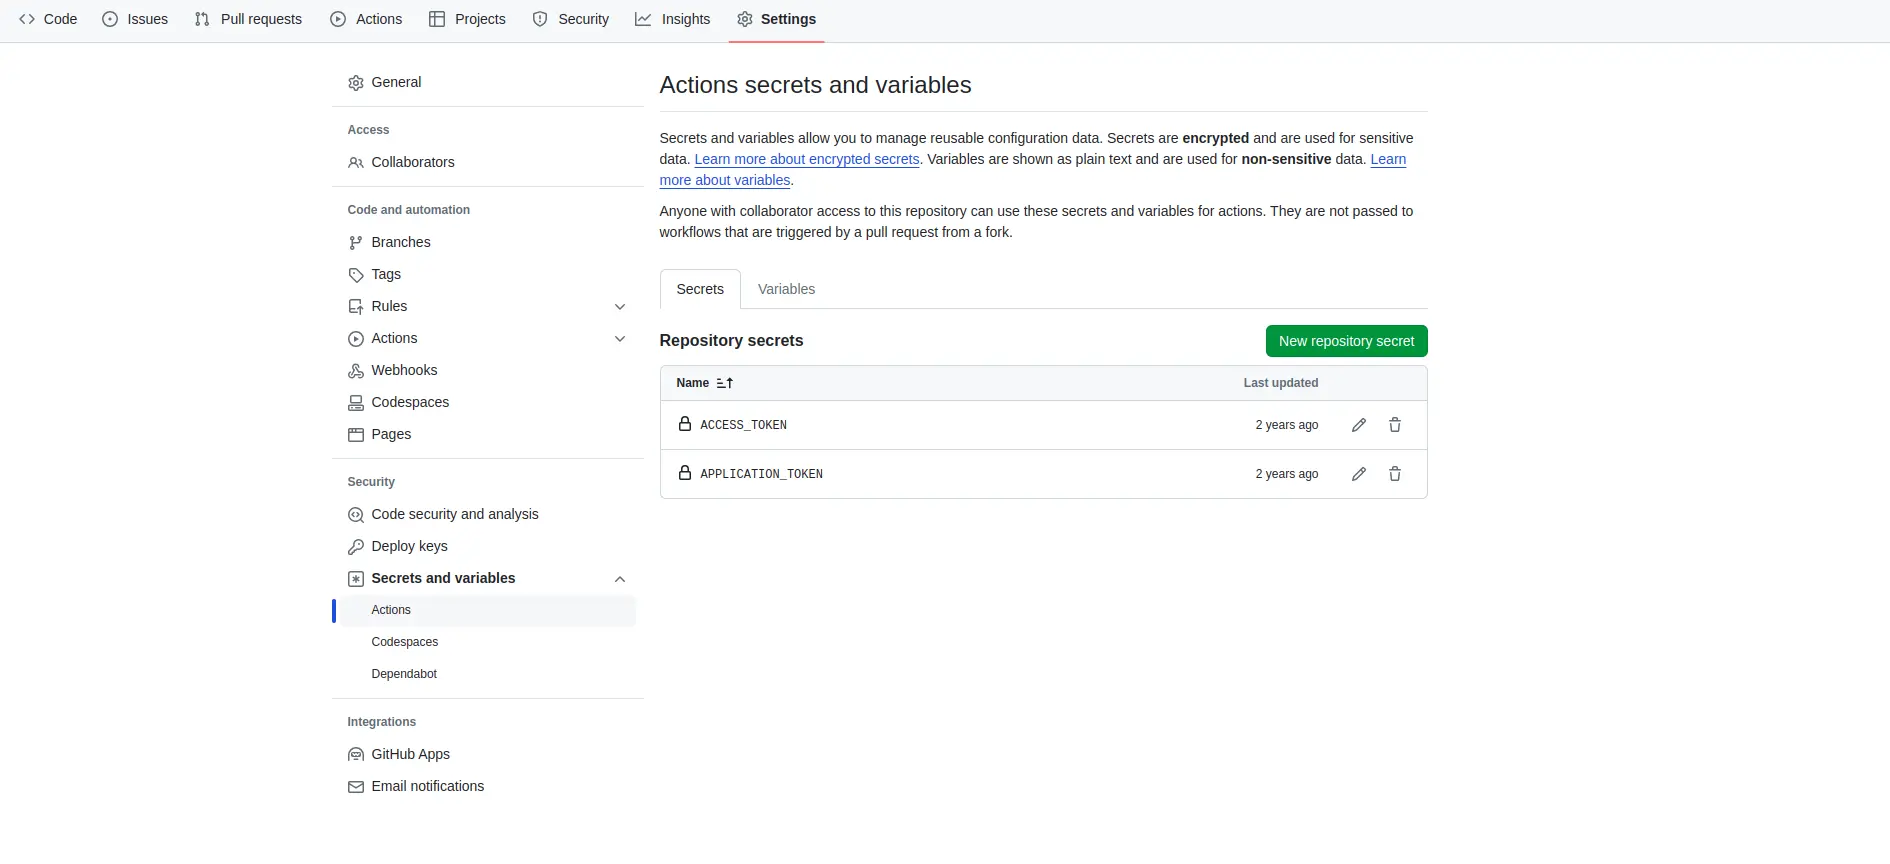
Step 3: Add Beagle Security access & application keys as security
Navigate to your GitHub repository.
Go to Settings and select Secrets and variables from the sidebar menu.
Click on the Actions and New repository secret button.
Add two secrets: beagle_access_token and beagle_application_token.
Populate these secrets with your Beagle Security access and application keys, respectively.
Click on Add secret to save the changes.
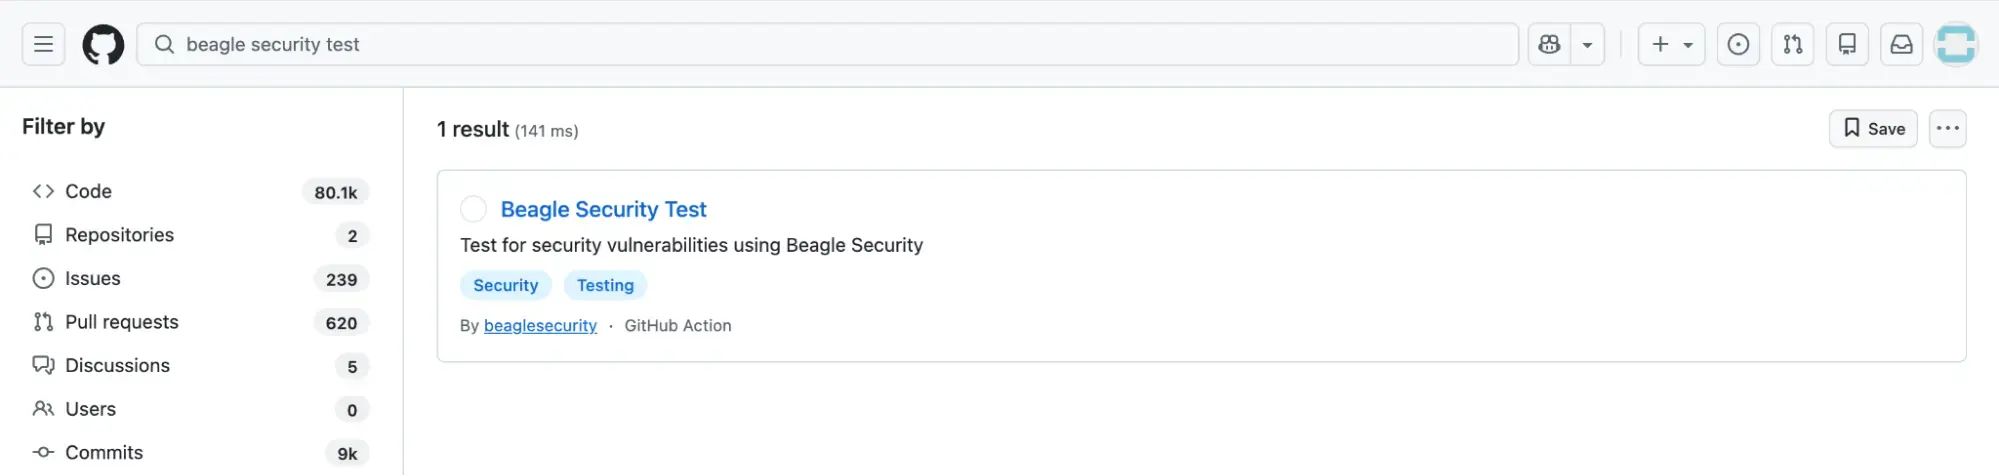
Step 4: Integrate Beagle Security test action
Go to the GitHub Marketplace by navigating to: https://github.com/marketplace.
Search for “Beagle Security Test” in the search bar.
Find the Beagle Security Test action and click on it.
Follow the instructions to install the action into your repository.
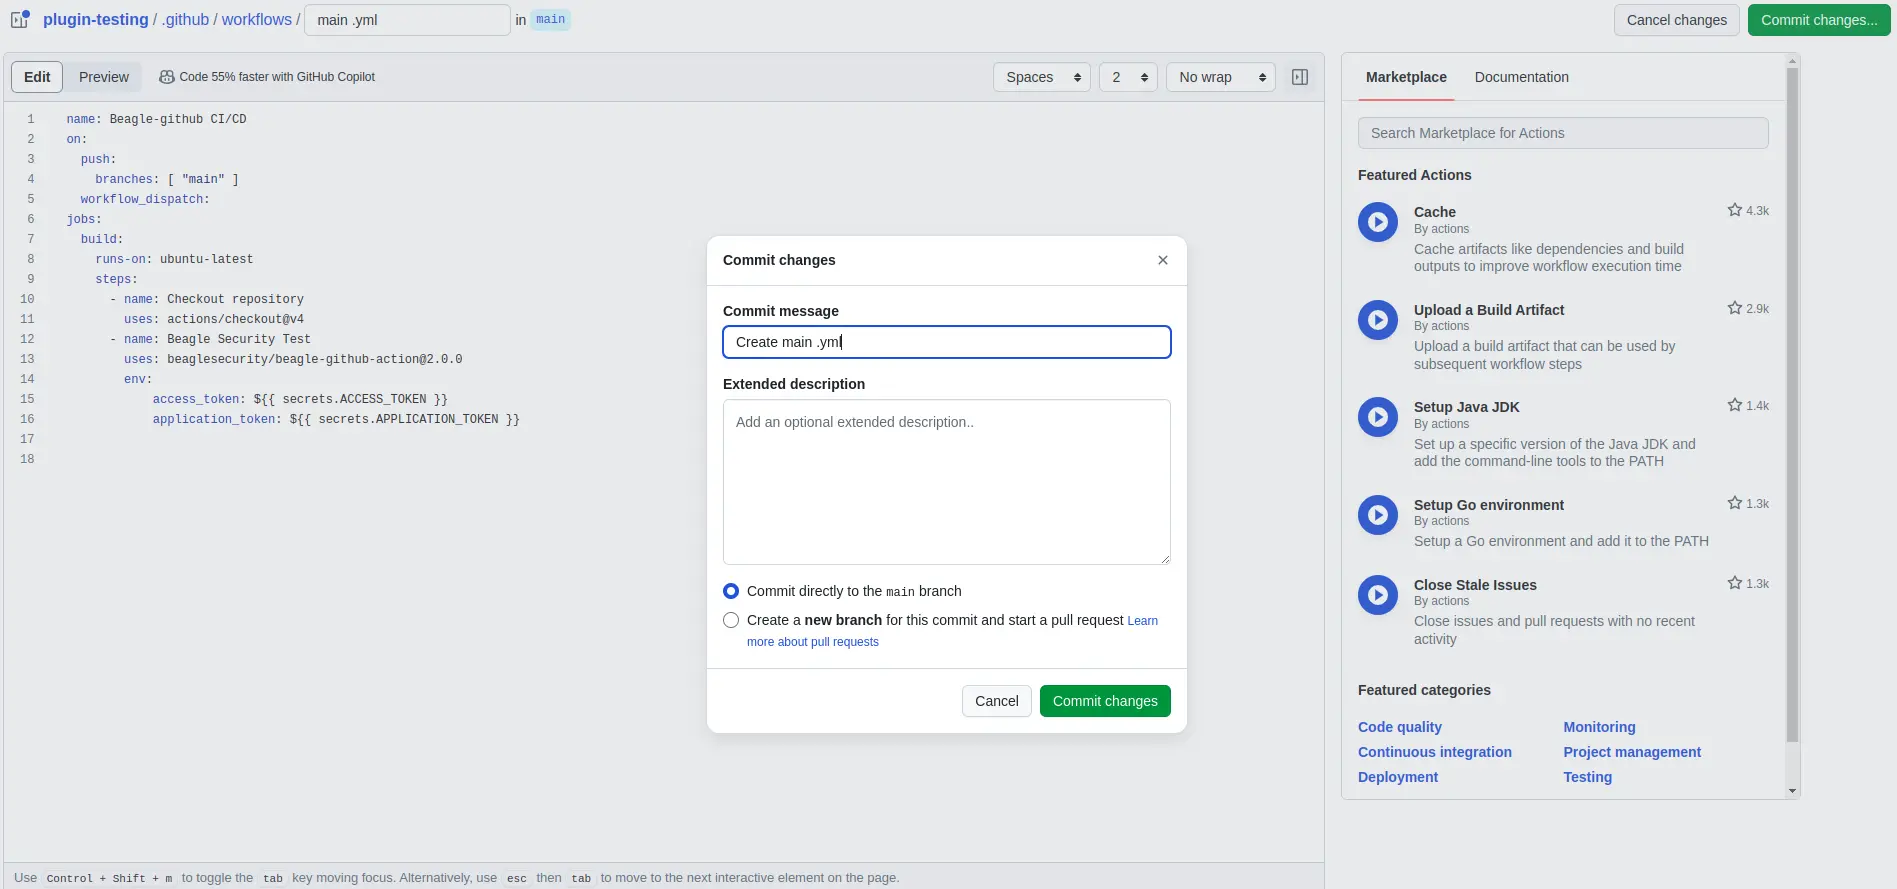
Step 5: Create Beagle Security test action
Once the Beagle Security Test action is installed, navigate to your repository’s workflows directory (e.g., .github/workflows).
Create a new YAML file for your workflow or edit an existing one.
Add the following configuration to your workflow YAML file:
name: BeagleSecurityTest
on:
  push:

jobs:
  security\_scan:
    runs-on: ubuntu-latest

    steps:
      - name: Checkout repository
        uses: actions/checkout@v4

      - name: Beagle Security Test
        uses: beaglesecurity/beagle-github-action@2.0.0
        env:
          access\_token: $
          application\_token: $
Step 6: Create and push changes
Save your changes to the workflow YAML file.
Commit the changes to your repository.
Push the changes to trigger the workflow execution.
Step 7: Monitor Beagle Security scan results
Once the workflow is triggered, GitHub Actions will execute the Beagle Security Test action.
Monitor the workflow execution logs to view the progress and results of the security scan.
Beagle Security will scan your application for vulnerabilities and provide detailed feedback on any security issues detected.
Step 8: Viewing vulnerabilities in Beagle Security after DAST
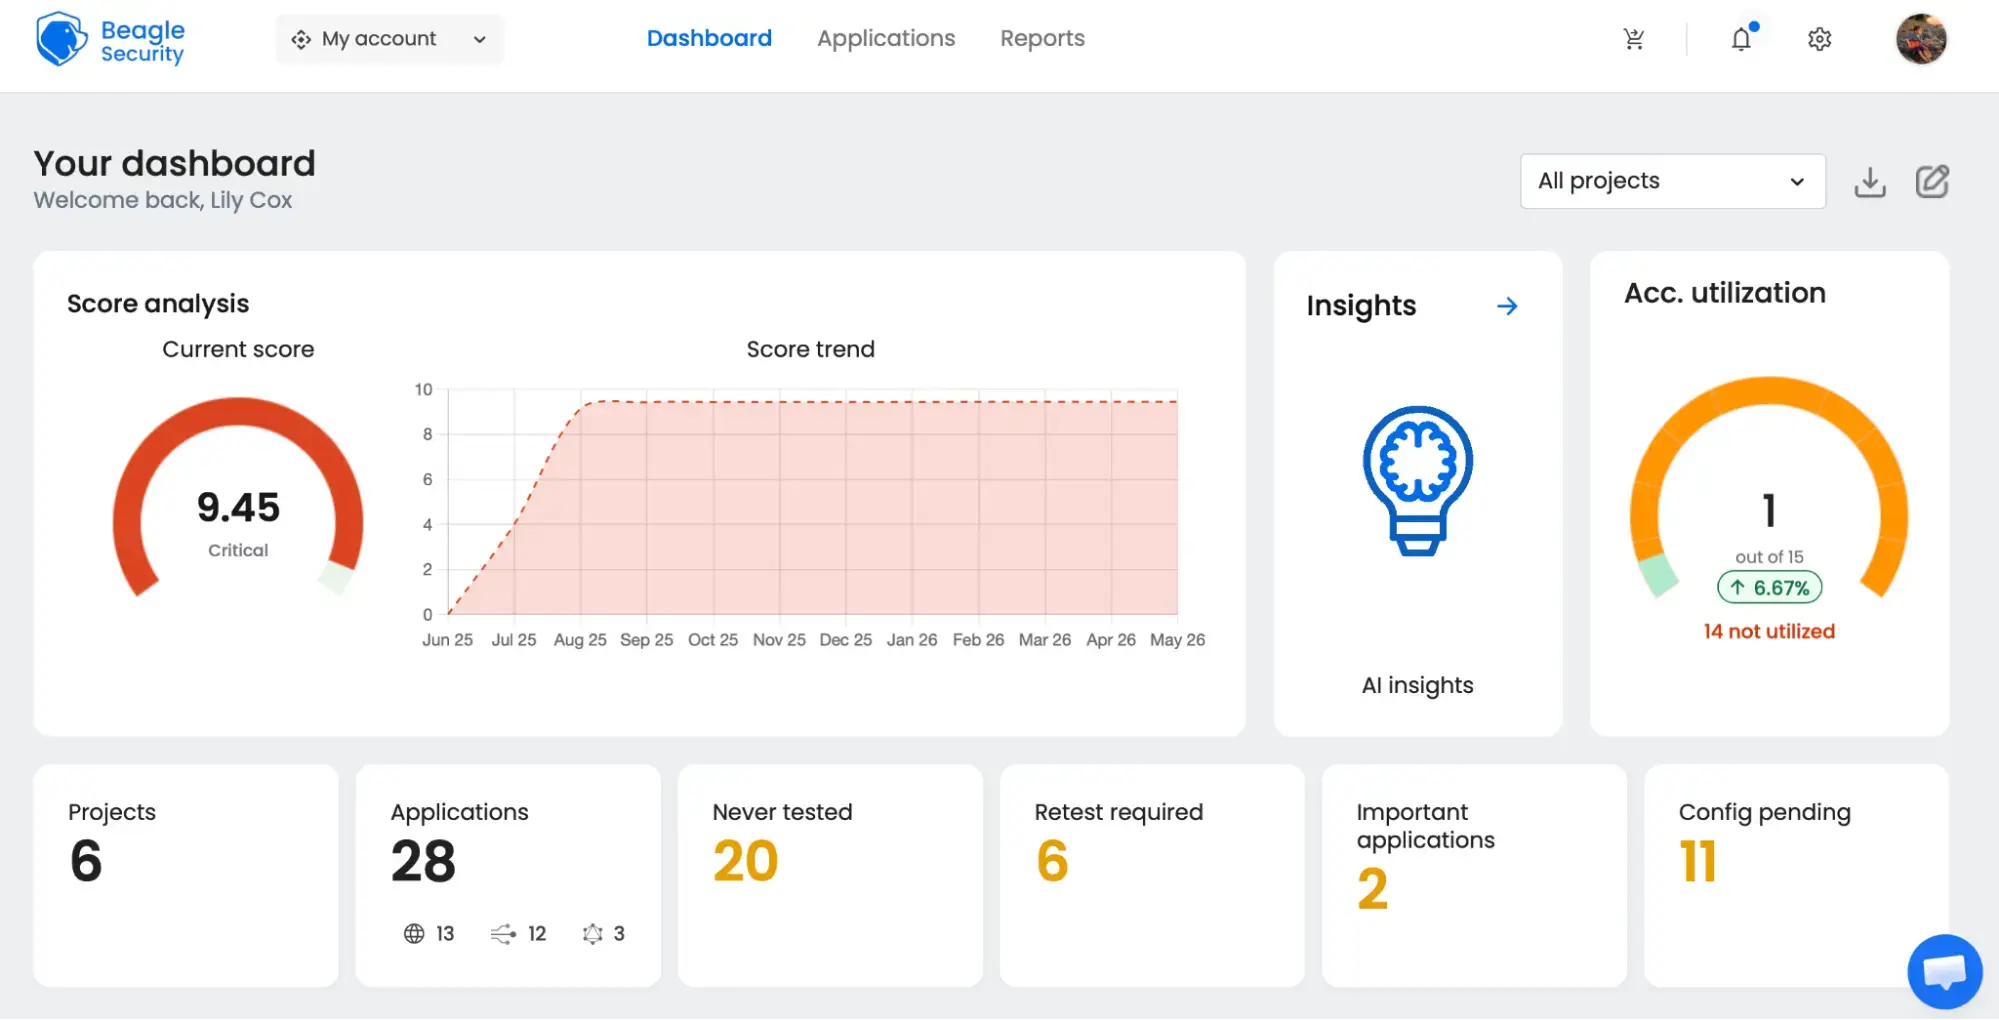
Once the DAST is completed for the GitHub CI/CD pipeline, you can view the results from your Beagle Security dashboard.
You’ll be able to see the following details in the application dashboard:
Security score of the application
Vulnerability classification based on criticality
Graphs for vulnerability catalog & vulnerability classification
OWASP Top 10 indicator mapping
Security posture of the application over a period
Vulnerability fixing rate graph
Past test sessions
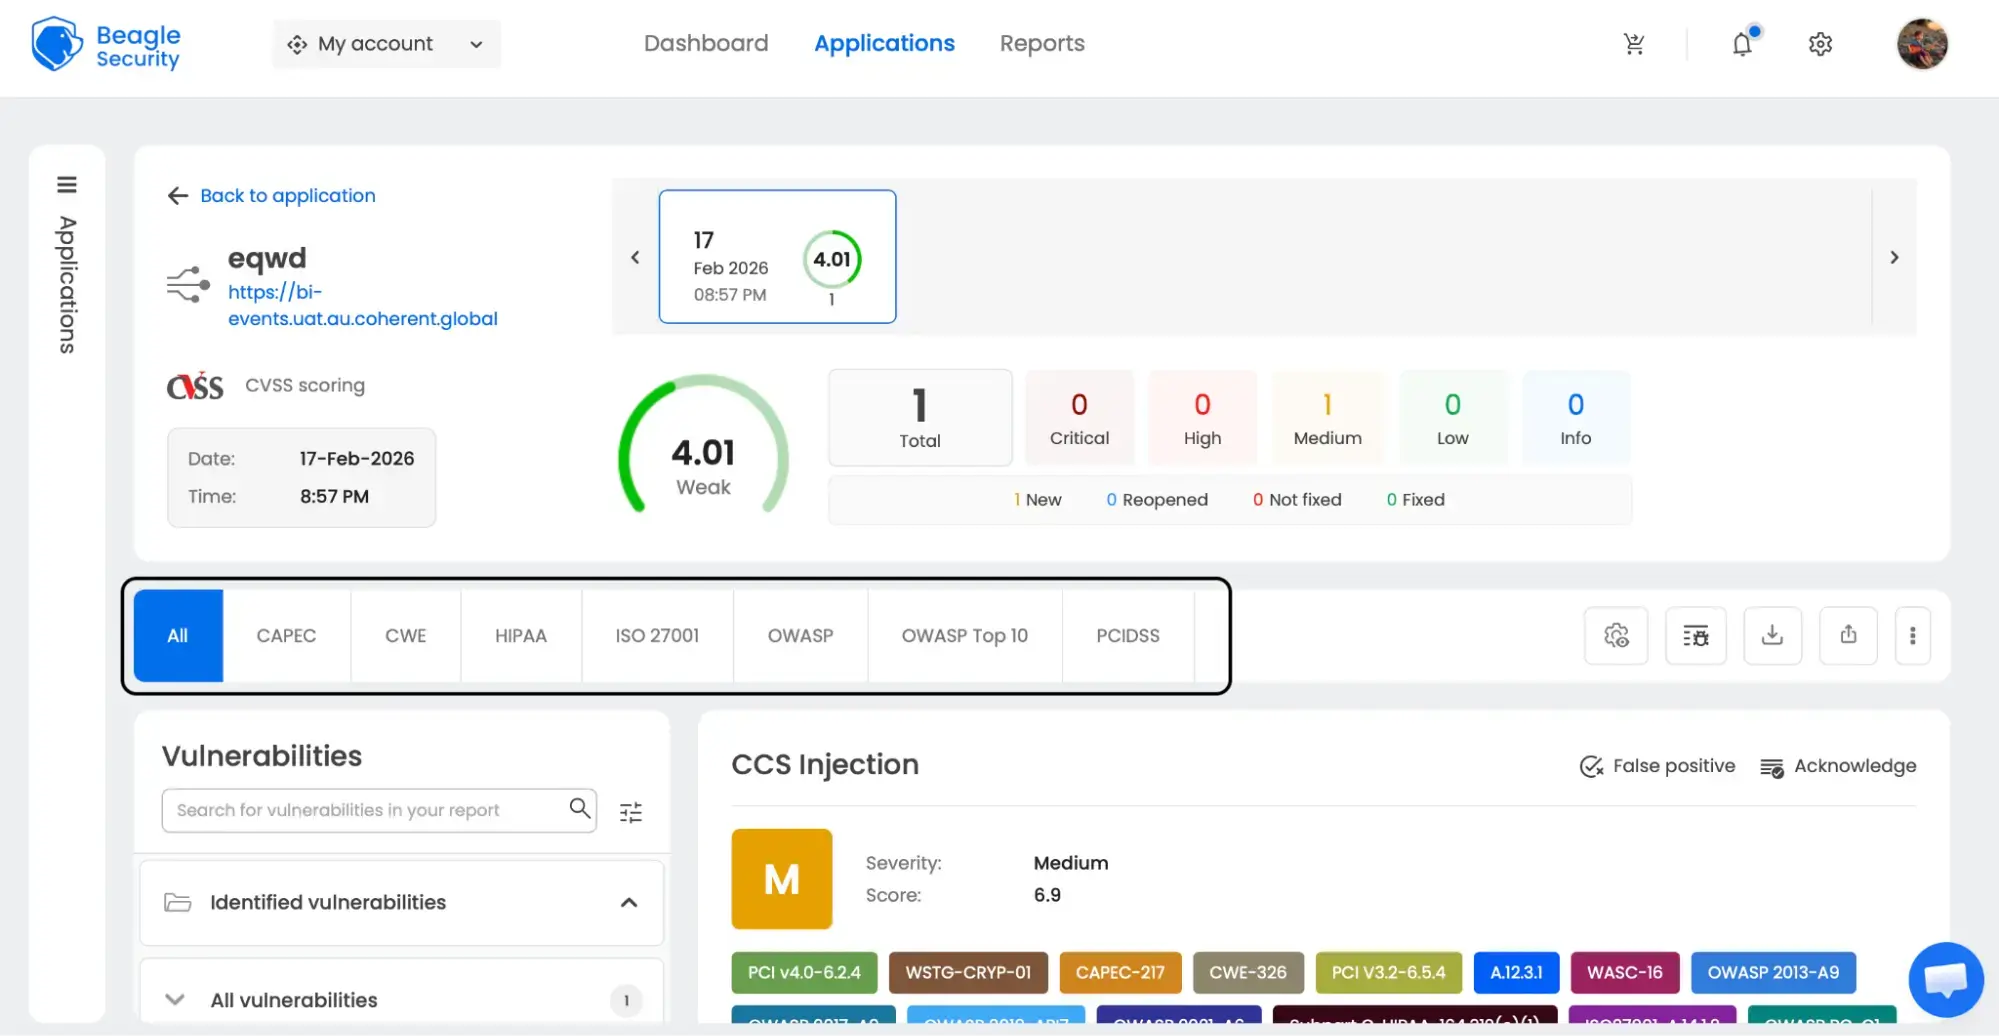
To delve deeper into the vulnerabilities, you can go to the detailed results dashboard of a particular test session. The results dashboard will include the following information:
Detailed listings of all vulnerability findings
Vulnerability tags and classification for each vulnerability finding against security standards
Detailed description, contextual recommendation, proof of exploit and occurrences of each vulnerability finding
Classification of vulnerability findings against OWASP, OWASP Top 10 & CWE Top 25
You can also download these results as PDF reports against OWASP, HIPAA, GDPR & PCI DSS standards
Check out a demo application dashboardin Beagle Security and get a hands-on trial.
By following these steps, you’ve successfully integrated Beagle Security into your GitHub Actions workflow. Now, you can automate security testing and ensure the safety and integrity of your applications throughout the development lifecycle.
Summing up
In conclusion, integrating DAST into your GitHub Action pipeline automation using the Beagle Security plugin can revolutionize the way you approach security testing for your web applications.
By incorporating automated security testing directly into your development workflow, you can identify and mitigate potential security vulnerabilities early in the development lifecycle, reducing the risk of security breaches and ensuring the overall security posture of your applications.
Furthermore, the integration of Beagle Security with GitHub Actions streamlines the security testing process, enabling developers to receive instant feedback on security vulnerabilities directly within their familiar development environment.
This facilitates timely resolution of security issues and enables developers to iteratively improve the security of their applications with each code change.
FAQs
What are the benefits of adding DAST into CI/CD pipelines?
Adding DAST into CI/CD pipelines helps teams identify vulnerabilities earlier, reduce manual testing effort, improve release confidence, and maintain more consistent application security testing across deployments.
Can DAST testing run automatically on every deployment?
Yes, DAST scans can be triggered automatically during pushes, pull requests, deployments, or scheduled workflows inside GitHub Actions, depending on how the pipeline is configured.
What vulnerabilities can DAST detect in web applications?
DAST tools commonly detect vulnerabilities like SQL injection, authentication issues, exposed endpoints, security misconfigurations, and other runtime application security problems.


![Top 10 SDLC tools [2025]](/blog/images/blog-banner-three-cover.webp "Top 10 SDLC tools [2025]")
")


