In light of the escalating frequency and sophistication of application security threats, relying solely on traditional security measures has become increasingly insufficient. That’s where Dynamic Application Security Testing (DAST) steps in as a critical component of modern security strategies.
This real-time approach to security testing provides invaluable insights into potential security risks within your applications.
By continuously monitoring for vulnerabilities as your applications evolve, DAST empowers you to proactively identify and address security weaknesses before they can be exploited by malicious actors.
Incorporating DAST into your DevSecOps practices can ensure that security is prioritized throughout the development process, from initial code creation to deployment and beyond.
Why do you need DAST in your organization?
DAST is indispensable for organizations aiming to secure their cybersecurity posture and shield against potential threats targeting their web applications.
By simulating real-world attacks, DAST acts as a vital tool in pinpointing vulnerabilities and weaknesses that may exist within these applications. Unlike static analysis or code reviews, DAST evaluates applications in their deployed state, offering a realistic assessment of their security under actual conditions.
Its comprehensive coverage extends across front-end and back-end components, APIs, and third-party integrations, ensuring that no potential vulnerabilities escape detection.
Moreover, through automation, DAST facilitates continuous monitoring, enabling organizations to promptly identify and mitigate any new vulnerabilities introduced by code changes or updates.
Compliance with regulatory standards further underscores the necessity of DAST, as it aligns with requirements mandating regular testing and assessment of application security.
In essence, DAST is an indispensable component of any organization’s cybersecurity strategy, empowering proactive defense against evolving cyber threats targeting web applications.
What is secure deployment practice?
Secure deployment practices encompass the final steps of delivering secure software, ensuring that the integrity and security of developed applications remain intact throughout the deployment process.
This involves automating deployment procedures to minimize manual errors and tying the success of deployment to the outcomes of integrated security verification checks.
Additionally, secure deployment extends beyond the mere mechanics of deployment to safeguard sensitive data, such as passwords and tokens, essential for application operation in production environments.
This may involve relocating production secrets from repositories and configuration files to well-managed digital vaults, or even dynamically generating secrets at deployment time.
Advanced secure deployment practices also include routine processes to detect and mitigate the presence of any unprotected secrets within the environment, fostering a proactive approach to security maintenance.
What is Jenkins?
Jenkins is an open-source automation server commonly used for building, testing, and deploying software projects. It allows developers to automate the process of integrating code changes from multiple contributors into a shared repository.
Jenkins enables developers to automatically build and test code changes whenever they are committed to a version control system.
Today we’re going to be looking at how you can integrate DAST into your Jenkins CI/CD pipeline using Beagle Security.
Integrating DAST into your Jenkins CI/CD pipeline?
Jenkins empowers developers worldwide to streamline their software development lifecycle.
With the Beagle Security plugin, Jenkins users can easily trigger automated penetration tests to secure their applications against a diverse range of vulnerabilities. And you can do these tests directly from your Jenkins pipelines using the plugin.
All you must do is to setup the application token and access token to trigger the penetration test. The integration flow is as follows:
Step 1: Install the Beagle Security plugin in Jenkins
- Login to Jenkins.
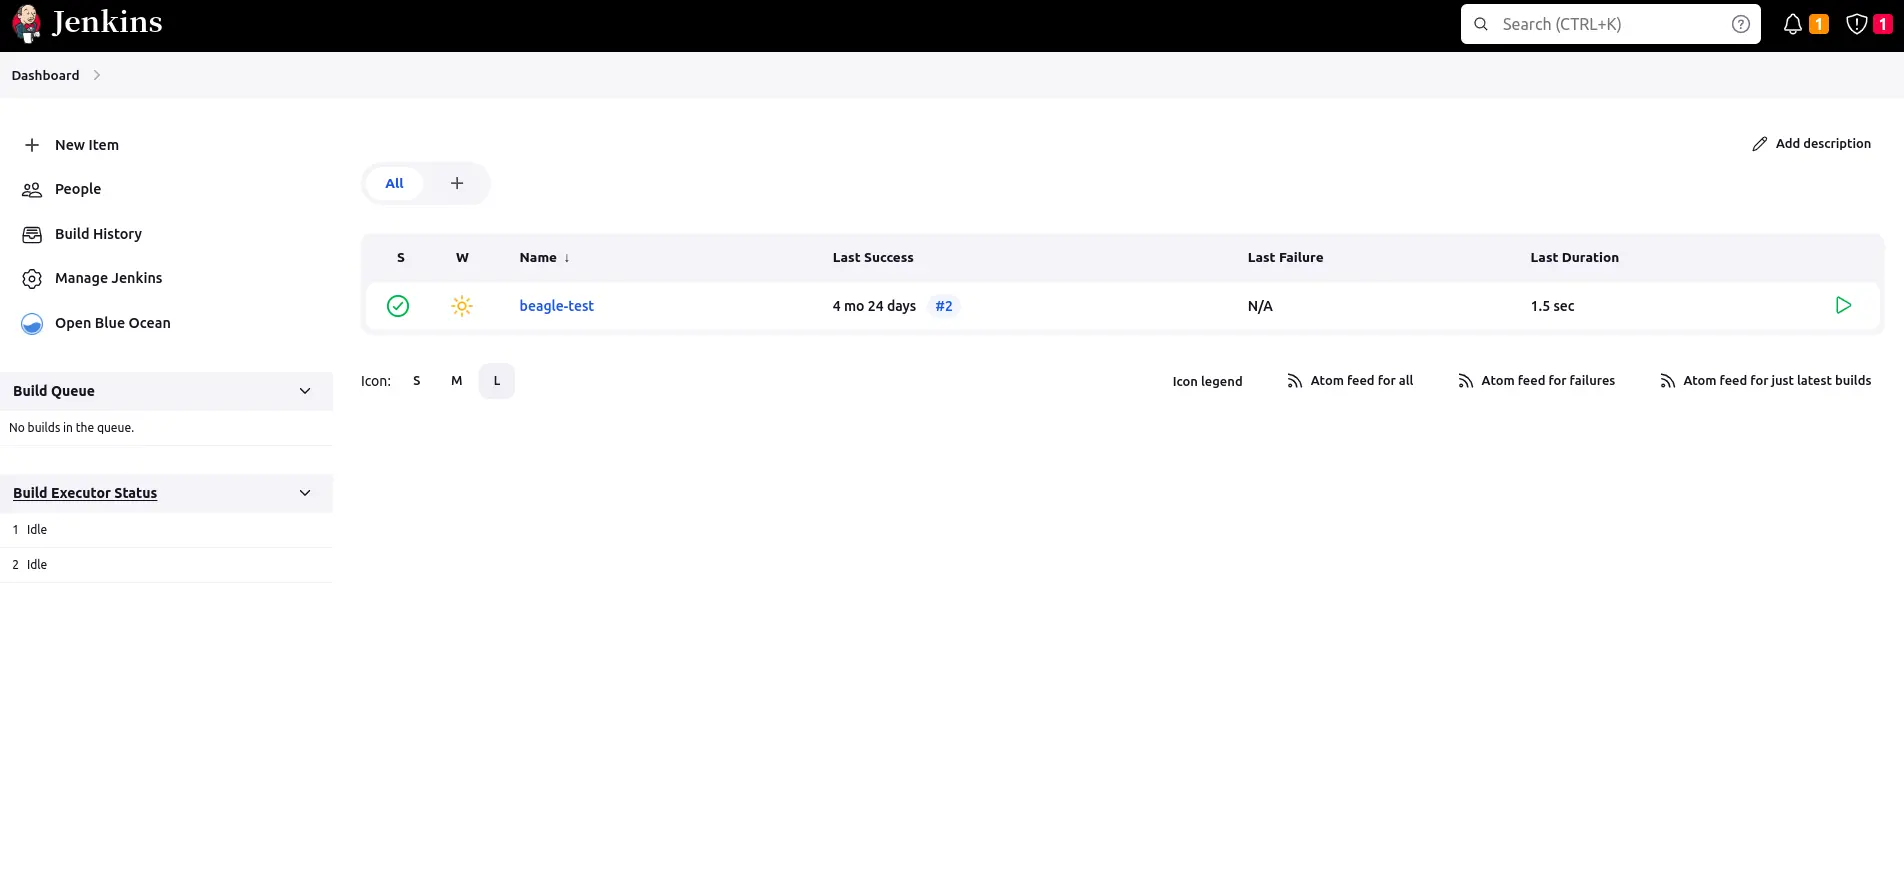
Navigate to “Manage Jenkins” > “Plugins”.
Click “Check Now” to retrieve the latest plugin information.
Switch to the “Available” tab.
Search for “Beagle Security” in the filter box.
Check the box next to “Beagle Security” and click “Install.”
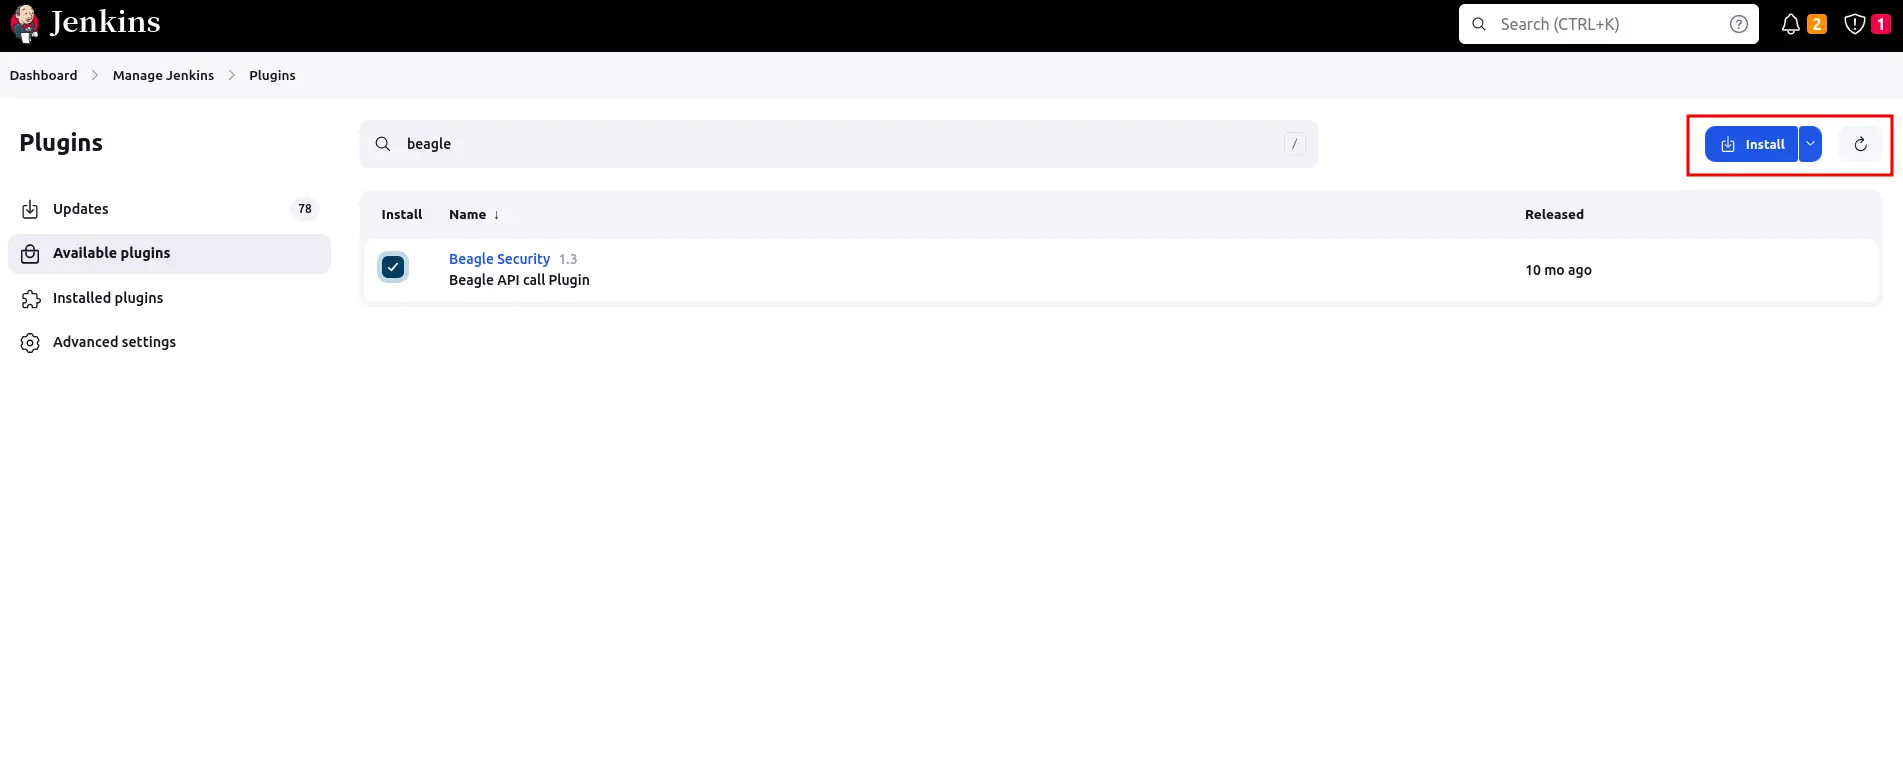
- Restart Jenkins if prompted.
Step 2: Generating access token in Beagle Security
- You can locate your personal access token from the profile drop-down menu.
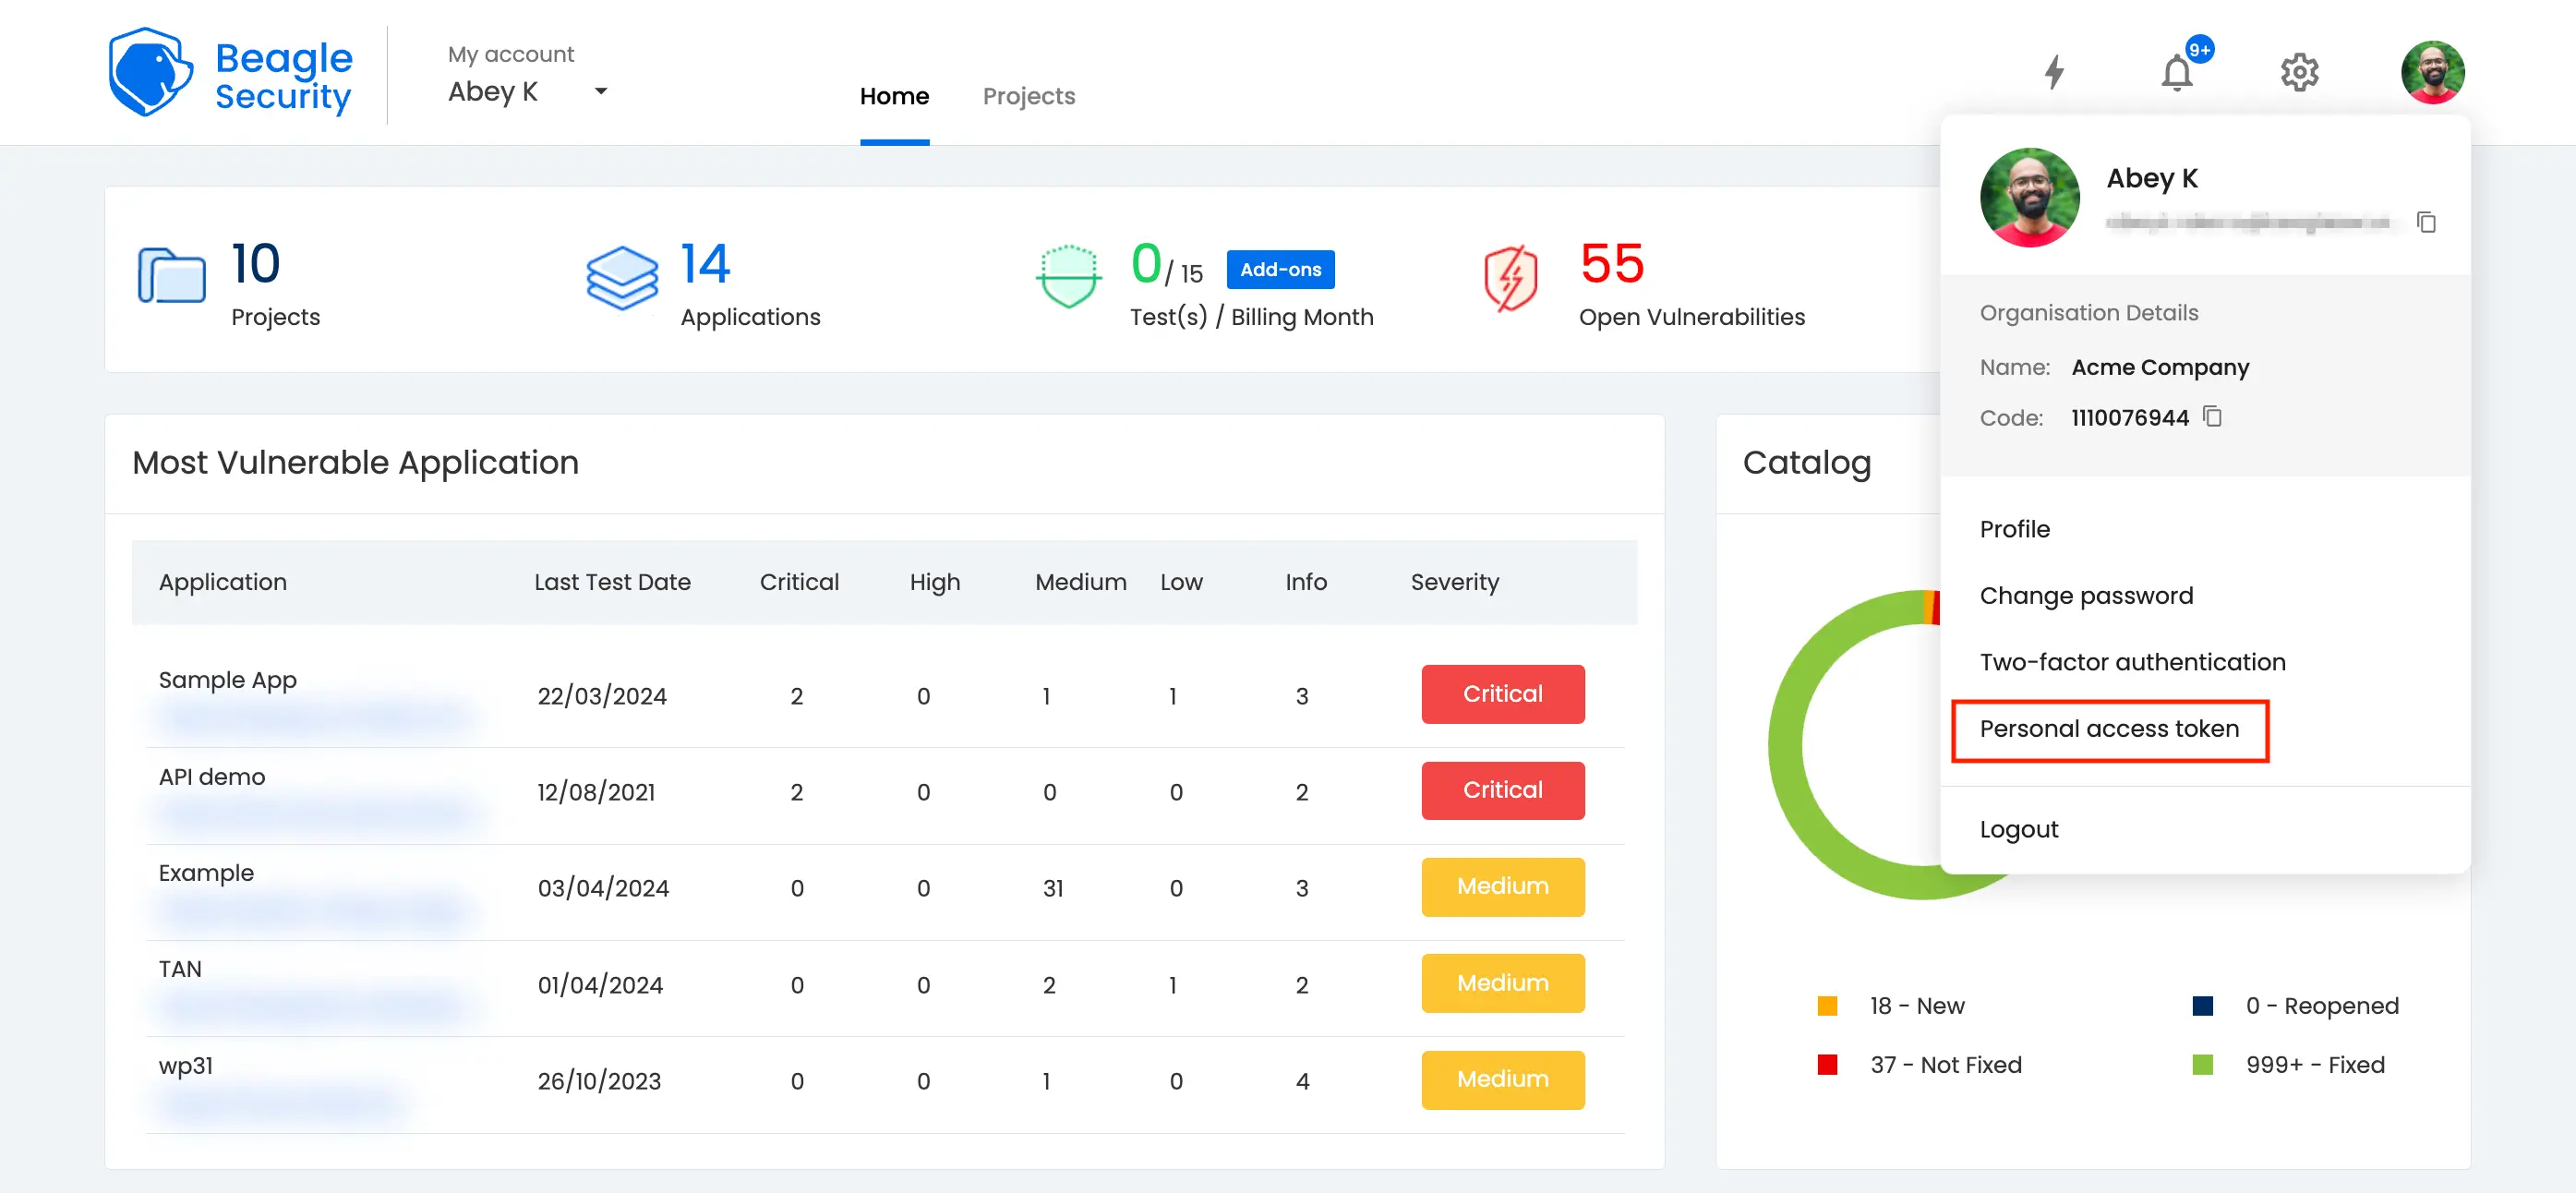
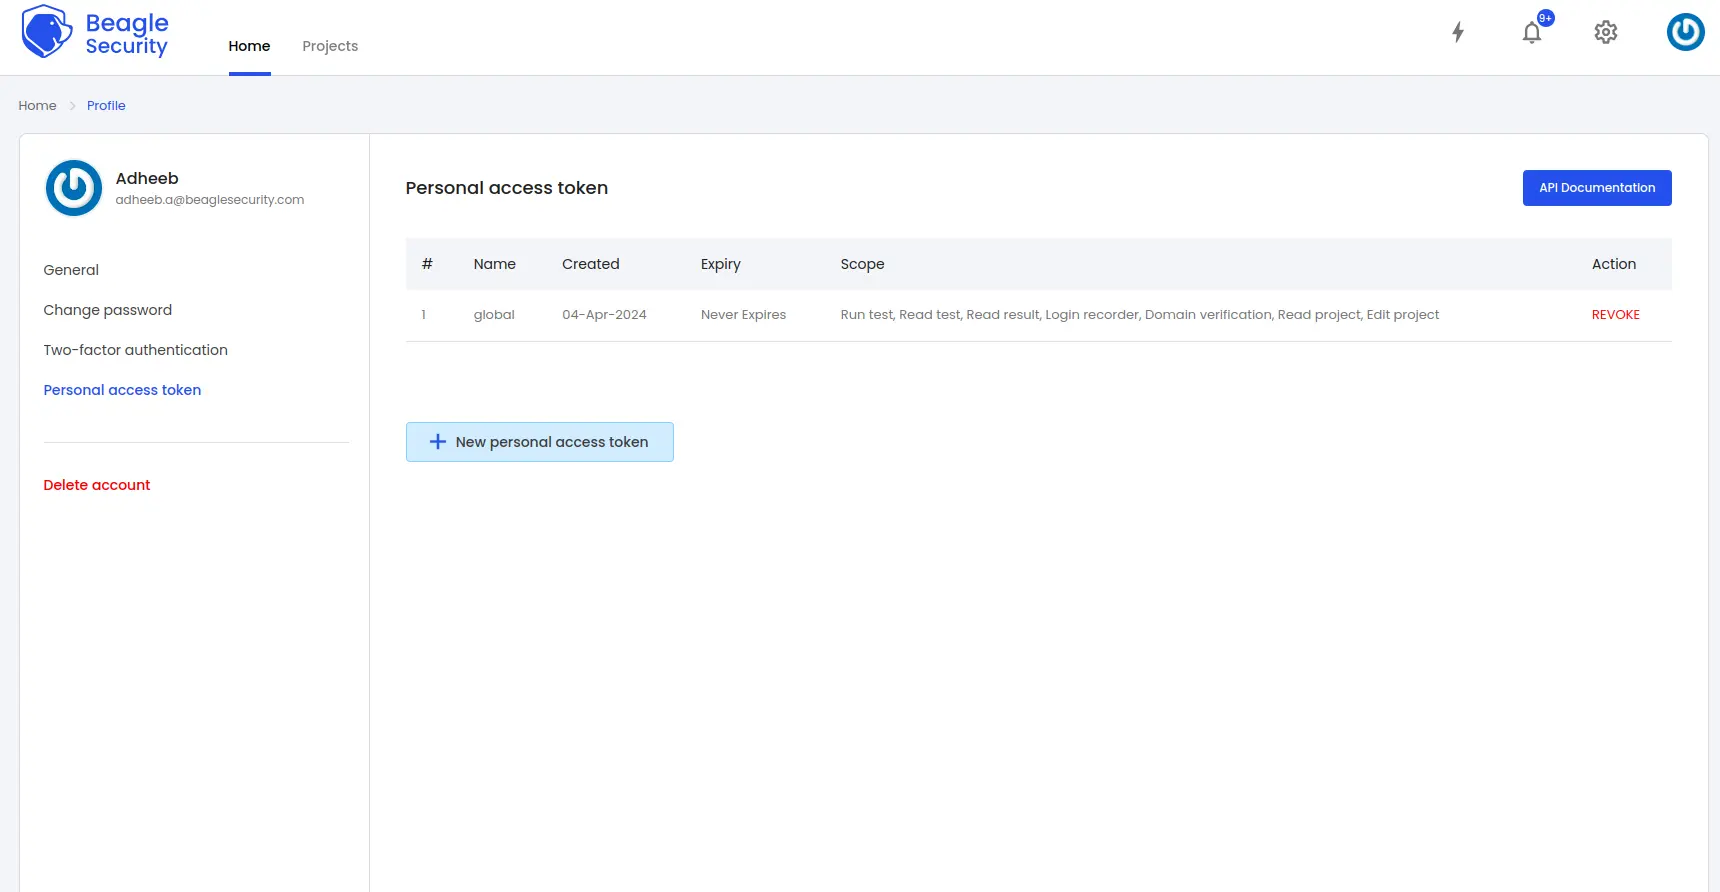
Click on the New personal access token button to generate a fresh token.
Name the access token and optionally set an expiry date.
Define the token’s scope based on your specific requirements.
Once created, you’ll receive a unique access token that can be copied for use.
Step 3: Where can you find the application token in Beagle Security?
- To get the application token, you must first add the URL as an application within Beagle Security.
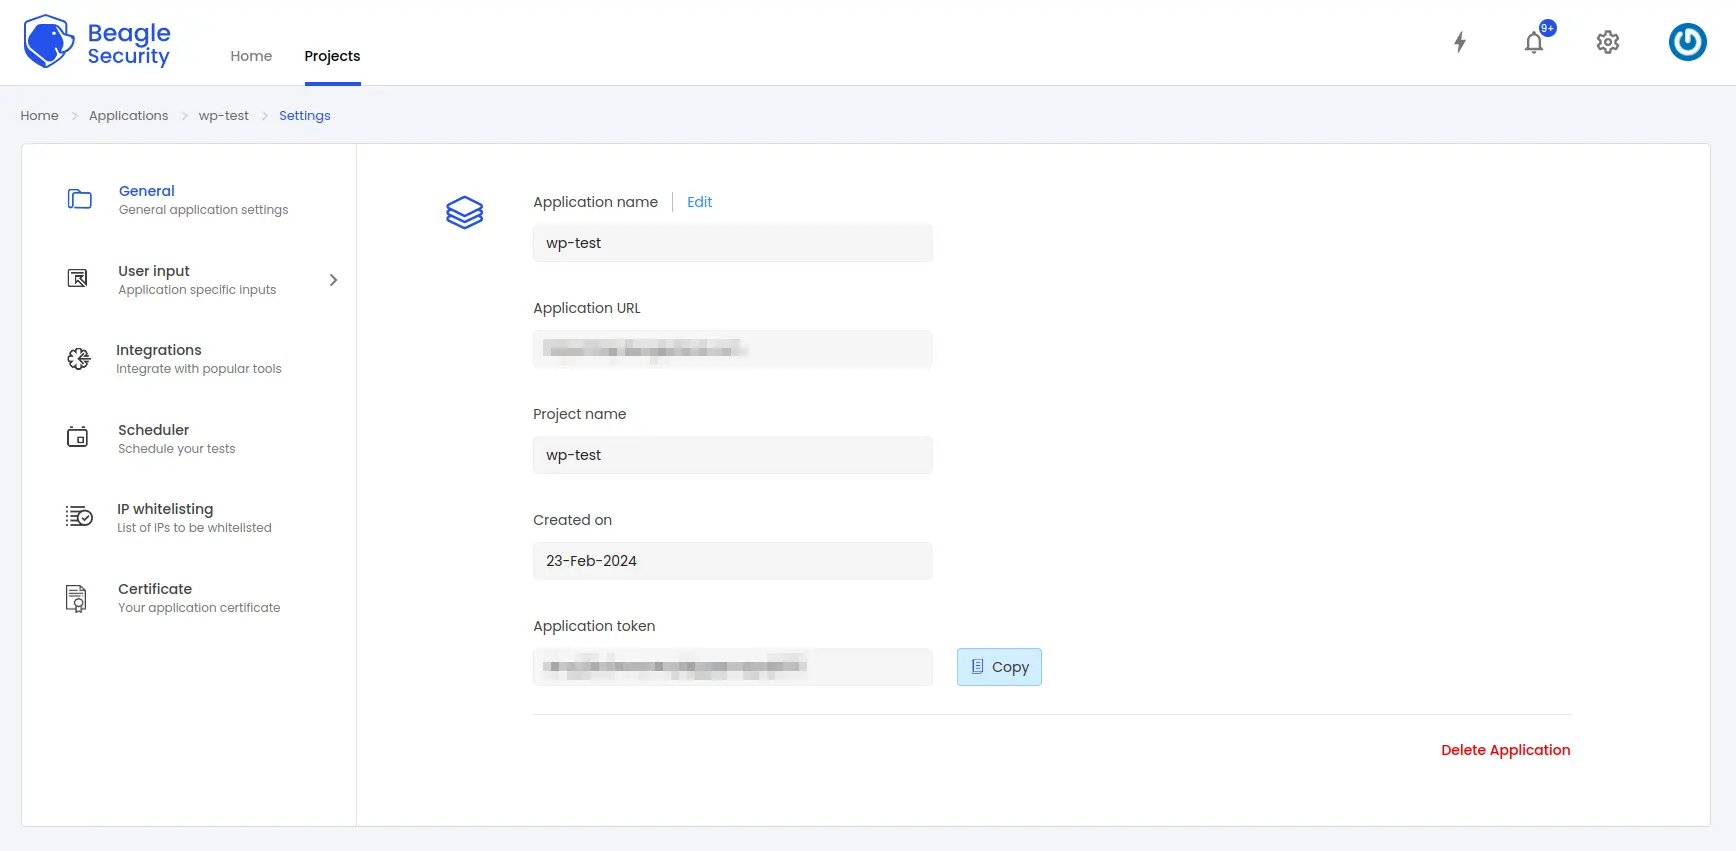
Go to the Application and navigate to its Settings.
Select the General tab.
You’ll be able to copy the application token for the specific application from there
Step 4: Setting up Application Token and Access Token in Jenkins
Setting up Application Token:
Select the project you want to configure.
Navigate to “Configure” -> “Select Build” -> “Add build step.”
Choose “Trigger Beagle Penetration Testing.”
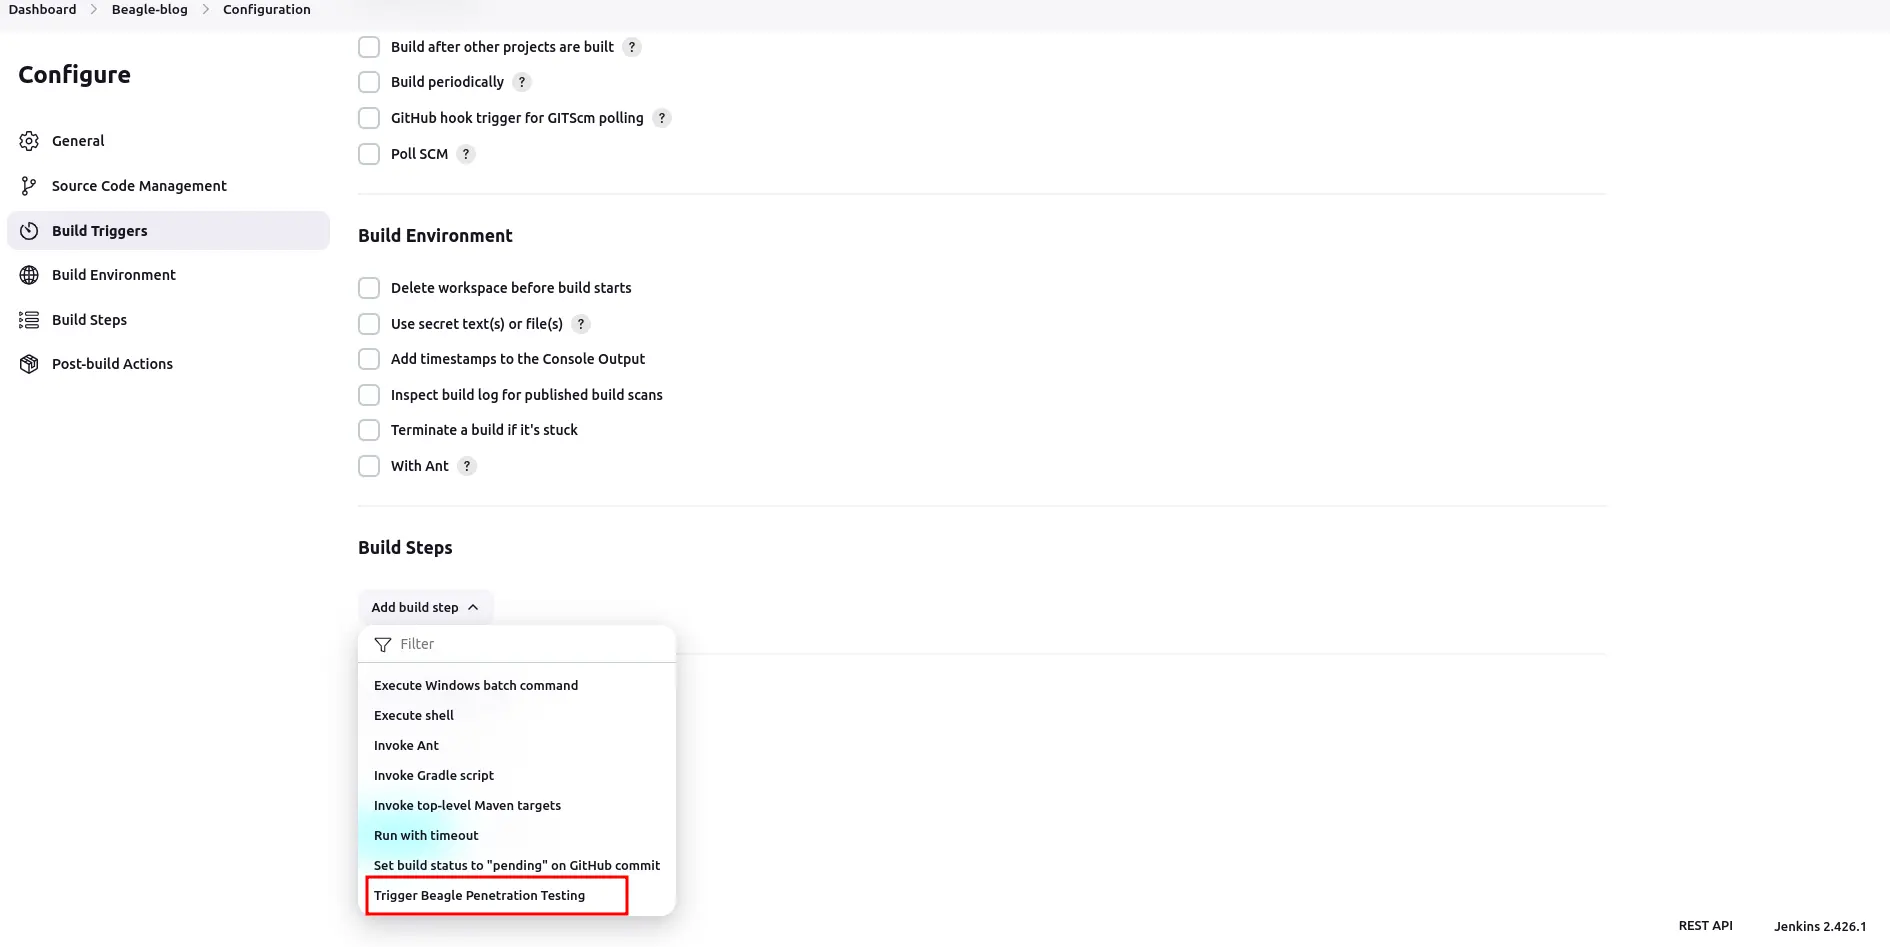
- Provide the Application Token and click “Save.”
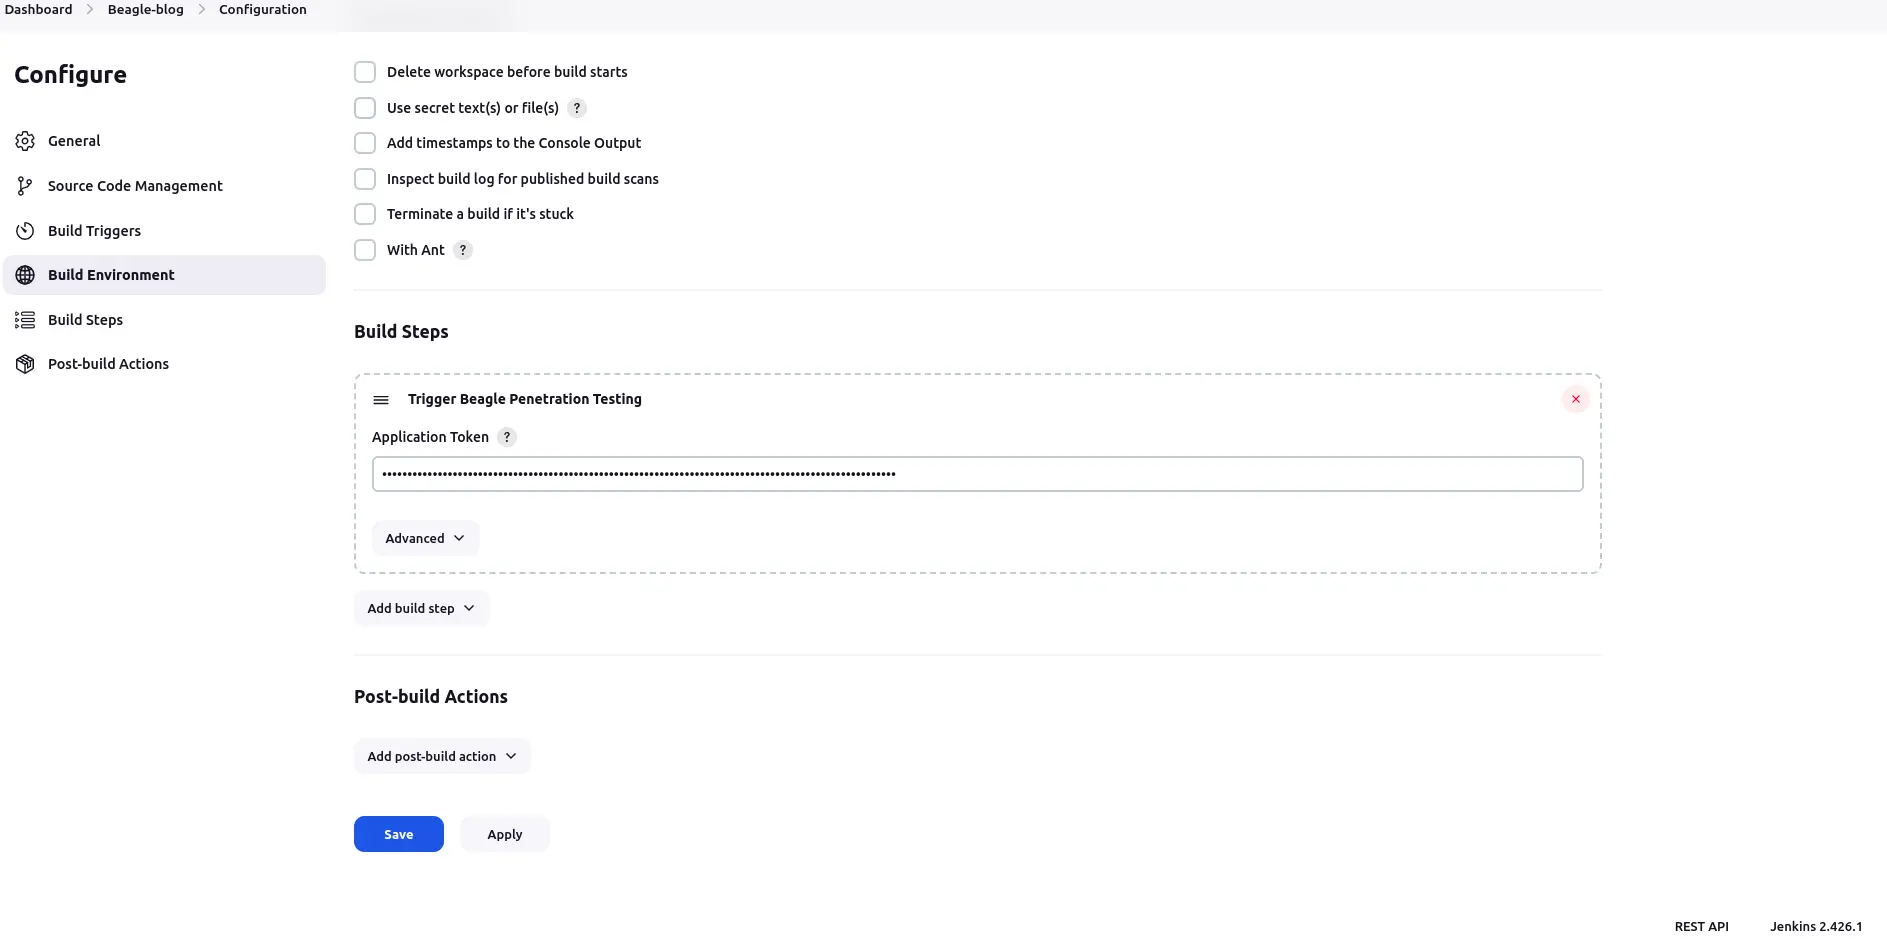
- Here’s how you can configure access tokens, offering two distinct options tailored to your organizational needs:
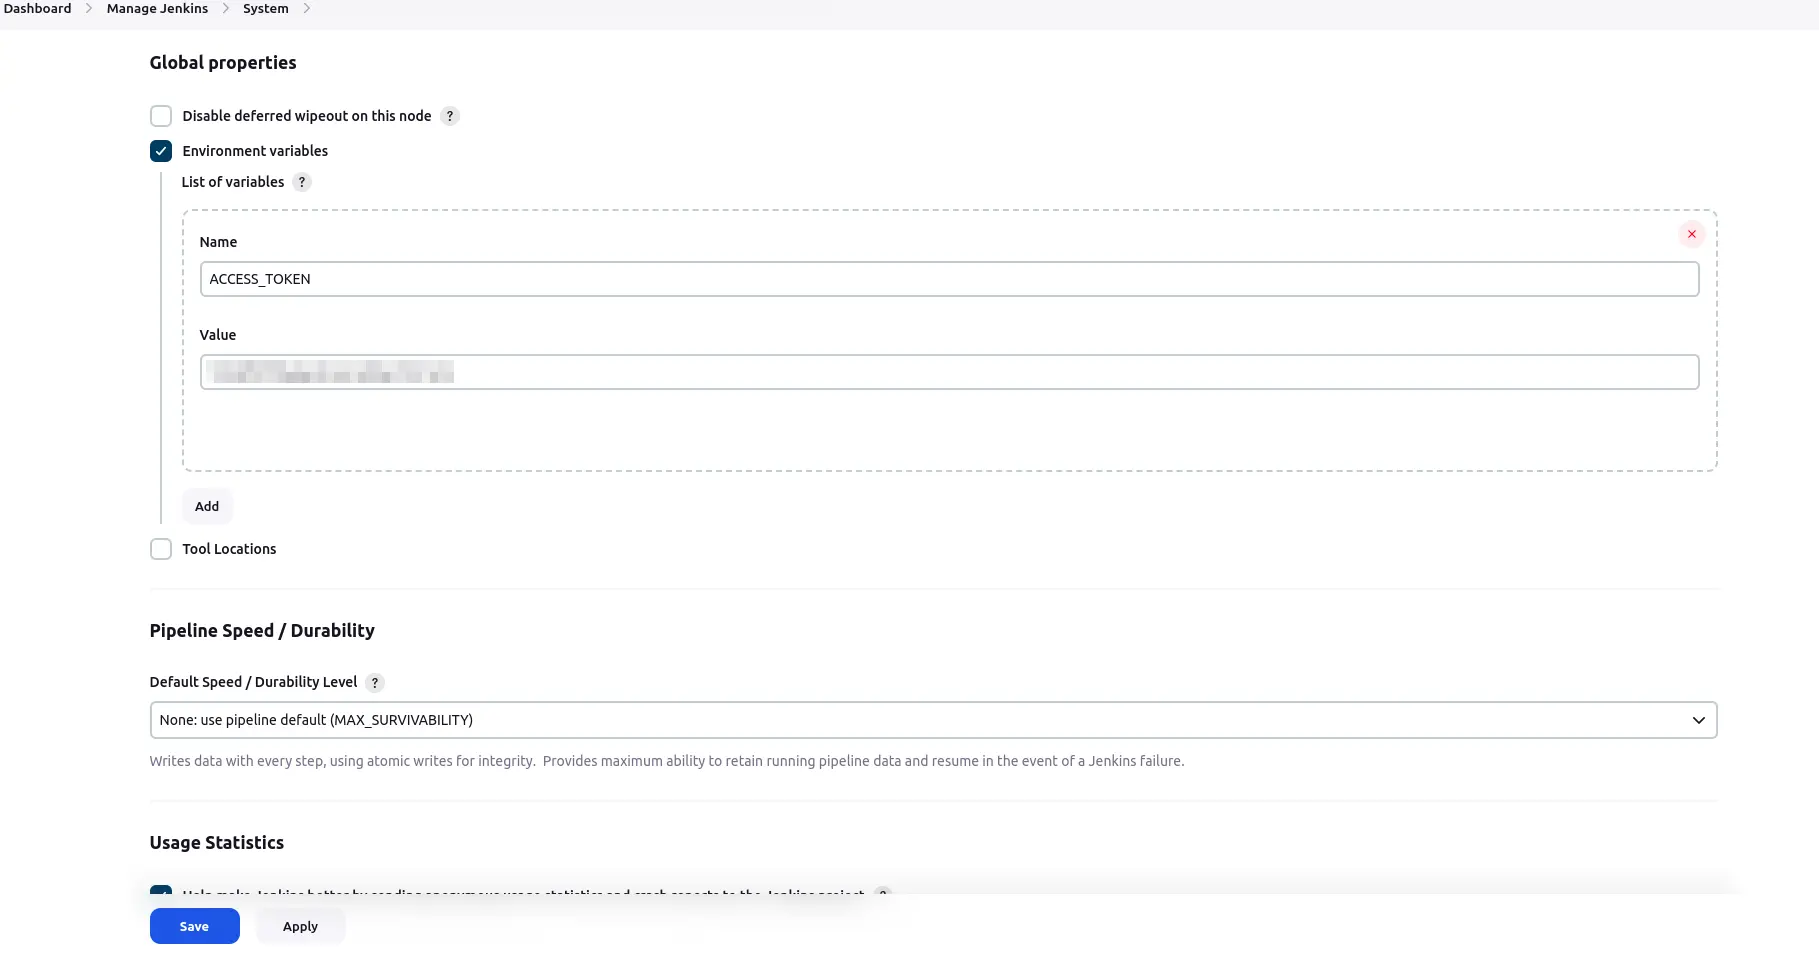
Configure globally: When opting for a global configuration, the access token will be utilized as the default setting across all projects within Jenkins. Follow these steps to configure it globally.
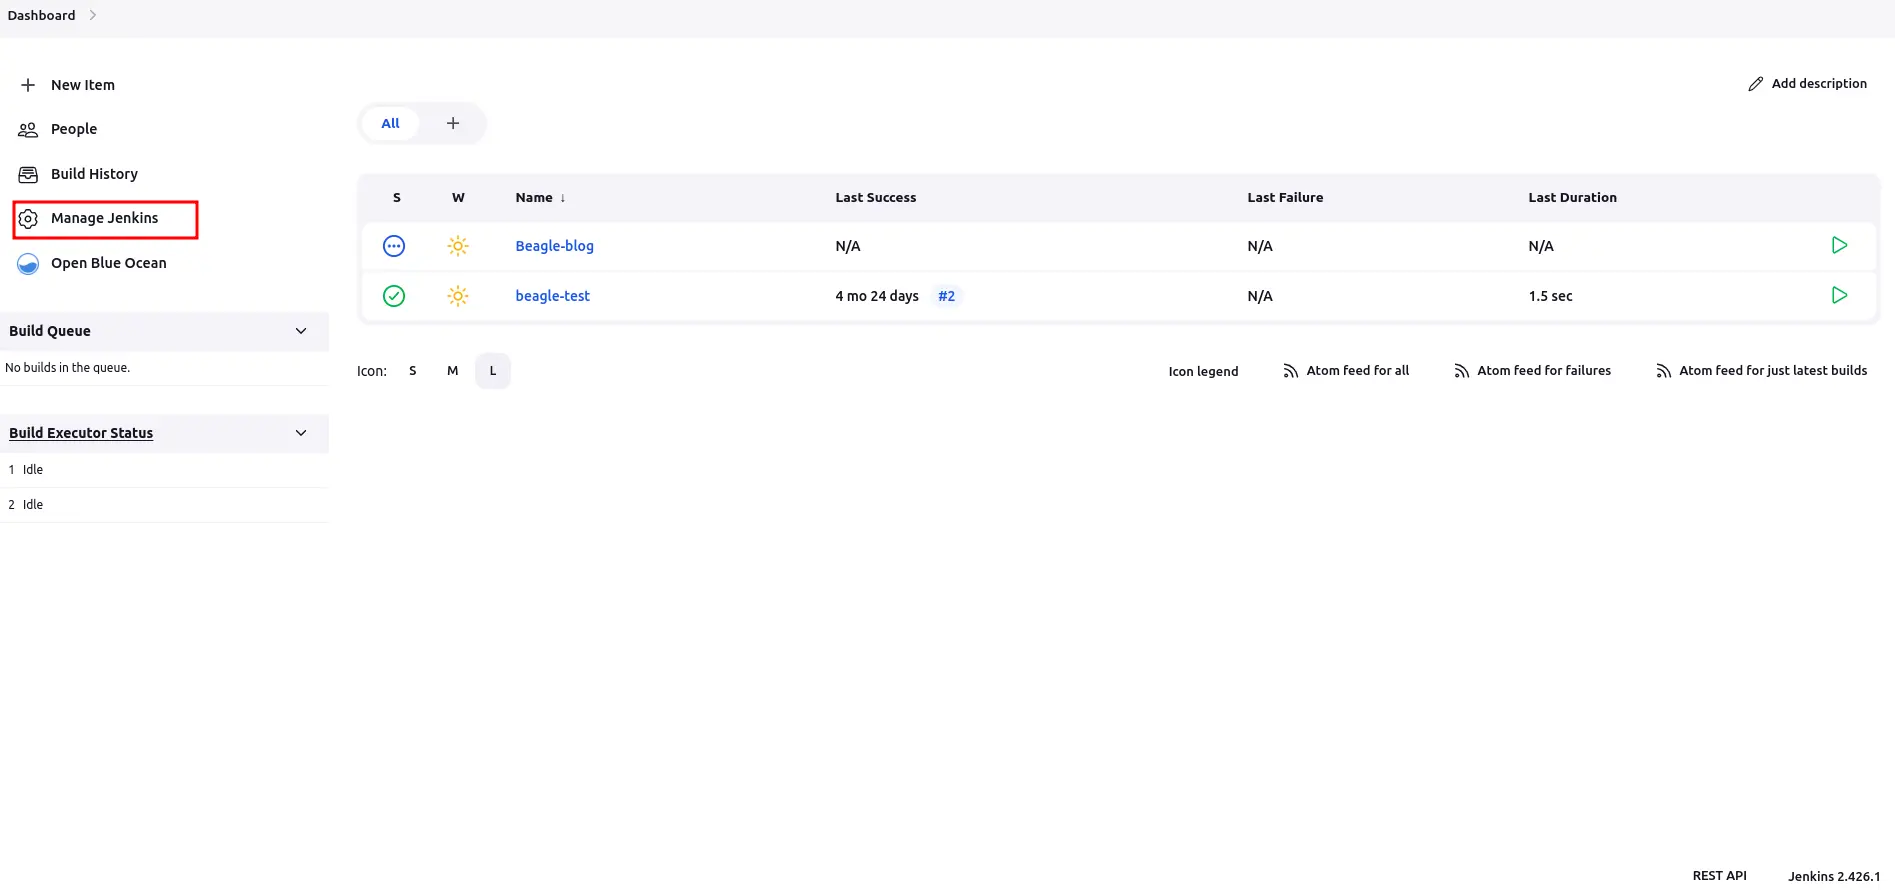
Navigate to “Manage Jenkins” from the Jenkins dashboard.
Select “System” from the list of options.
Locate the section related to Beagle Security.
Specify your access token in the designated field.
Click “Save” to preserve the changes.
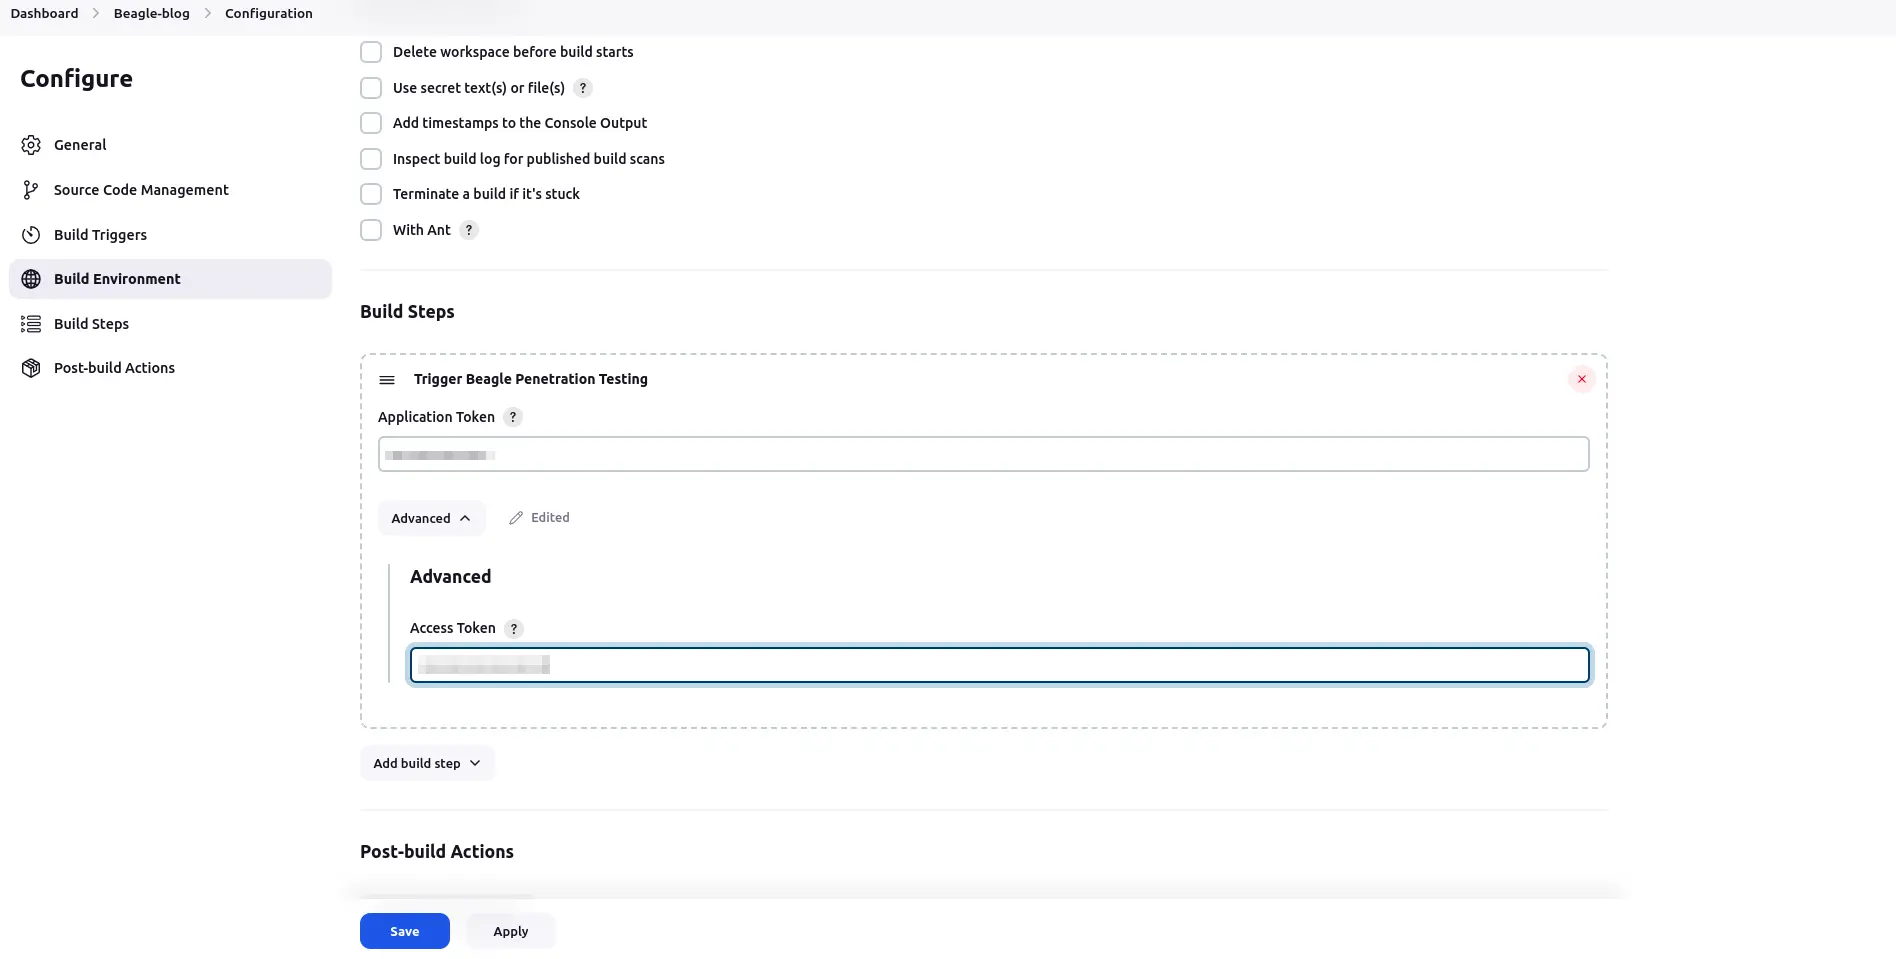
Configure locally: You may prefer to configure access tokens on a per-project basis, allowing for more granular control and flexibility. Here’s how to configure it for a specific project.
Navigate to the desired project within Jenkins.
Click on “Configure” to access the project’s settings.
Select “Build” from the available options.
Add a new build step and choose “Trigger Beagle Penetration Testing.”
Navigate to the “Advanced” settings for the selected build step.
Provide the access token in the designated field.
Save the configuration to apply the changes.
Step 5: Viewing vulnerabilities in Beagle Security after DAST
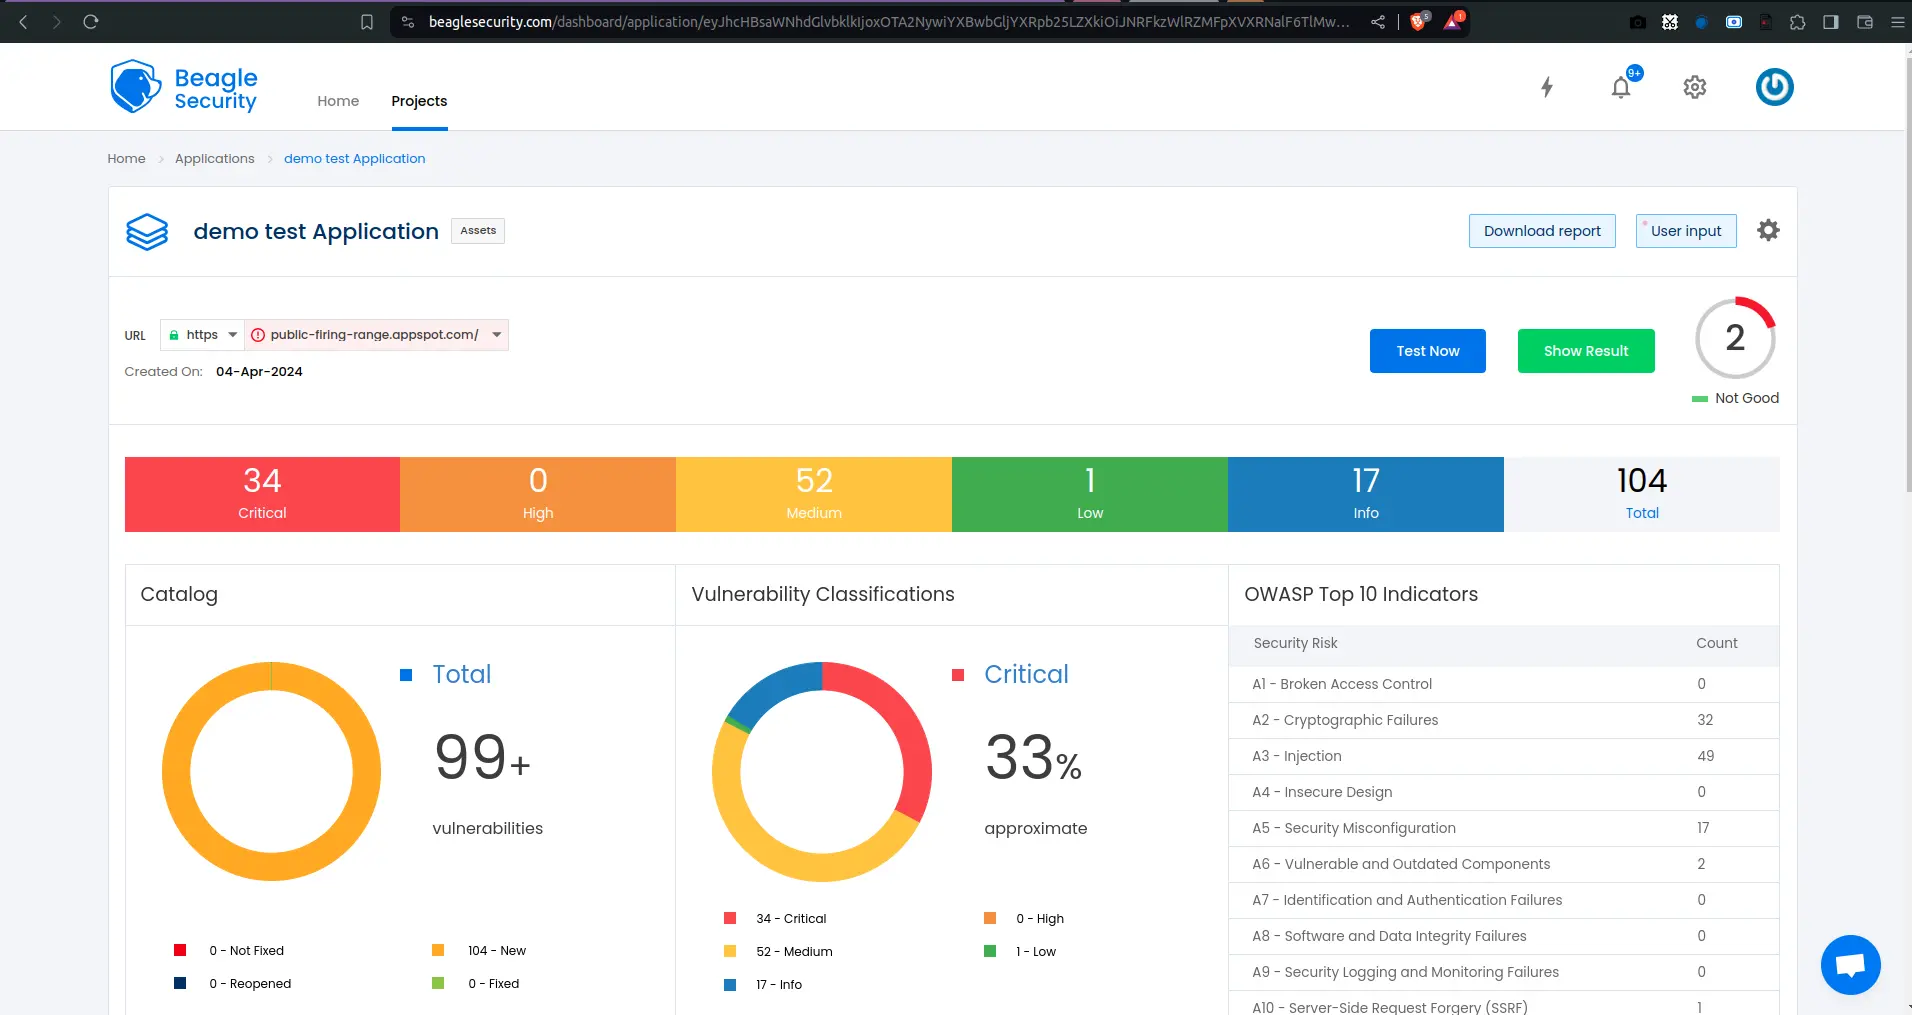
Once the DAST is completed for the Jenkins CI/CD pipeline, you can view the results from your Beagle Security dashboard.
You’ll be able to see the following details in the application dashboard:
Security score of the application
Vulnerability classification based on criticality
Graphs for vulnerability catalog & vulnerability classification
OWASP Top 10 indicator mapping
Security posture of the application over a period
Vulnerability fixing rate graph
Past test sessions
Check out a demo application dashboard in Beagle Security.
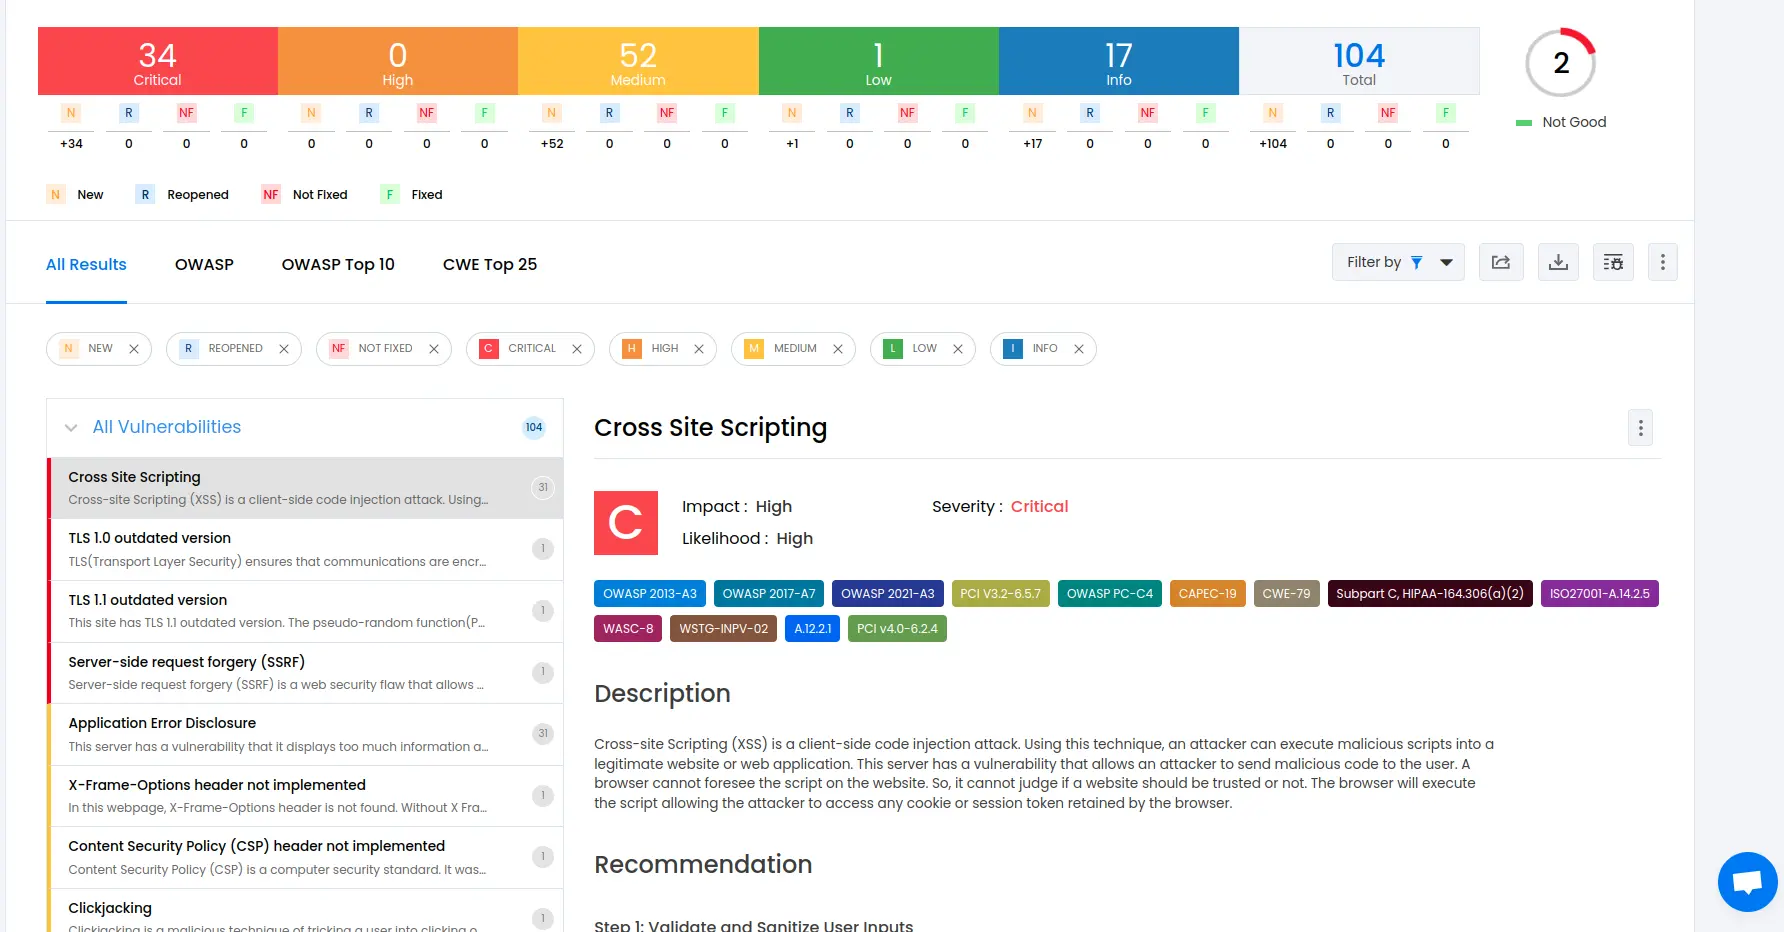
To delve deeper into the vulnerabilities, you can go to the detailed results dashboard of a particular test session. The results dashboard will include the following information:
Detailed listings of all vulnerability findings
Vulnerability tags and classification for each vulnerability finding against security standards
Detailed description, contextual recommendation, proof of exploit and occurrences of each vulnerability finding
Classification of vulnerability findings against OWASP, OWASP Top 10 & CWE Top 25
You can also download these results as PDF reports against OWASP, HIPAA, GDPR & PCI DSS standards
Check out a demo results dashboard in Beagle Security.
Summing up
In summary, integrating Beagle Security DAST into your Jenkins CI/CD pipeline offers a proactive approach to application security.
By leveraging tools like Beagle Security, you can automate the detection of vulnerabilities throughout the development and deployment process, seamlessly integrating security into your DevOps workflows.
With DAST integrated into your CI/CD pipeline, you can identify and remediate security issues early in the development lifecycle, reducing the risk of potential breaches and ensuring that your applications are resilient against evolving threats.
By prioritizing security from the onset, you can build and deploy software with confidence, safeguarding your organization’s assets and reputation.
![Top 10 SDLC tools [2025] Top 10 SDLC tools [2025]](/blog/images/blog-banner-three-cover.webp)


![Best rated DAST tools [2025] Best rated DAST tools [2025]](/blog/images/top-rated-dast-tools-cover.webp)
