
Jenkins, a renowned open-source automation server, plays a vital role in software development by facilitating tasks like software building, testing, and deployment.
It empowers developers to automate various aspects of the development pipeline, such as continuous integration and continuous deployment.
In the realm of continuous integration software, effective management of secrets within Jenkins is indispensable for upholding the security and reliability of the applications undergoing development and deployment.
This blog post explores the best practices for secrets management in Jenkins, encompassing topics like the setup and administration of secrets, as well as strategies for addressing potential security vulnerabilities.
Additionally, the blog delves into the storage of secrets using HashiCorp Vault and outlines the integration of Vault with Jenkins for an extra layer of security.
The secrets in Jenkins- a short understanding
In the Jenkins environment, secrets, also known as credentials, play a vital role in various authentication and authorization tasks.
These secrets encompass sensitive data like passwords, API keys, and private SSH keys.
To effectively manage these secrets, it’s crucial to recognize that Jenkins operates within two distinct scopes: system-wide and job-specific.
System-wide secrets are accessible to all jobs and projects within a Jenkins instance, typically serving shared purposes such as credentials for a common database or Git repository.
On the other hand, job-specific secrets are confined to a particular job or project, often serving specific tasks like deploying to a designated environment.
Best practices in secret management within Jenkin
Best practices are pivotal in secrets management within Jenkins.
This involves employing different secrets for distinct purposes, implementing access restrictions, and regularly refreshing and rotating secrets to mitigate the potential impact of a security breach.
Configuring Jenkins secrets having grasped the concept of Jenkins secrets, let’s now move to the setup and configuration process.
Configuration of secrets in Jenkins
The procedure for configuring secrets in Jenkins varies based on the type of secret and the specific use case.
One approach to configure Jenkins secrets is through the Jenkins web interface. To begin, navigate to the “Credentials” page within the Jenkins settings.

The Credentials Plugin in Jenkins offers multiple avenues for storing secrets. When configuring a secret, it’s advisable to adhere to best practices, such as providing it with a descriptive and distinctive name that clearly communicates its intended purpose. Avoid using generic or vague names that could lead to confusion or hinder the identification of the correct secret.
Furthermore, it is crucial to establish appropriate scopes for credentials based on their intended usage. For instance, if a credential is exclusively required for a specific job or pipeline, it should be scoped to that particular context rather than being globally accessible. This scoping strategy serves to reduce the likelihood of unauthorized access or misuse of credentials.
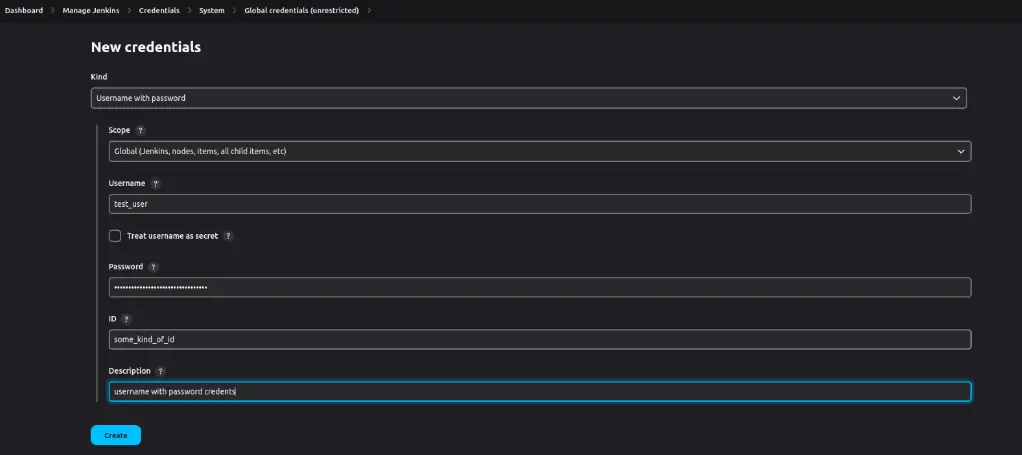
Saved DockerHub username and password with a global scope.
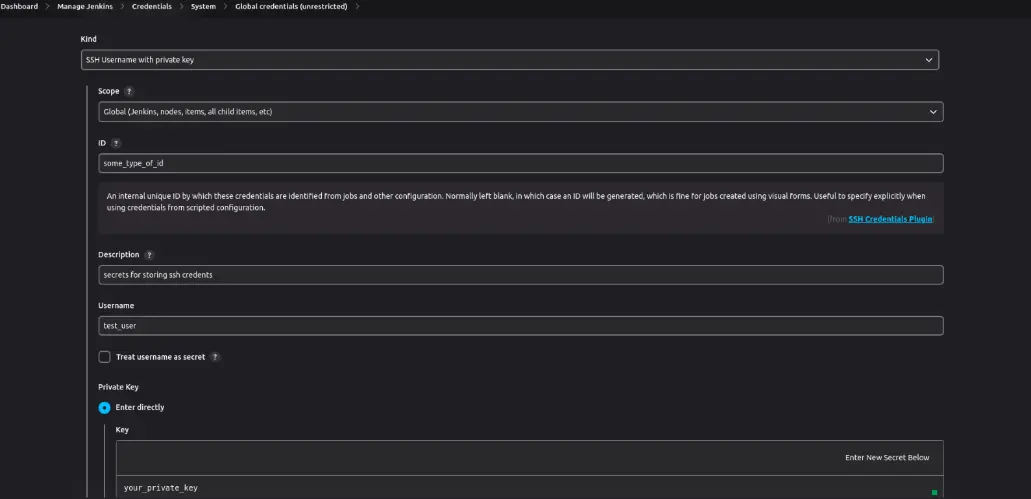
Example of storing SSH keys
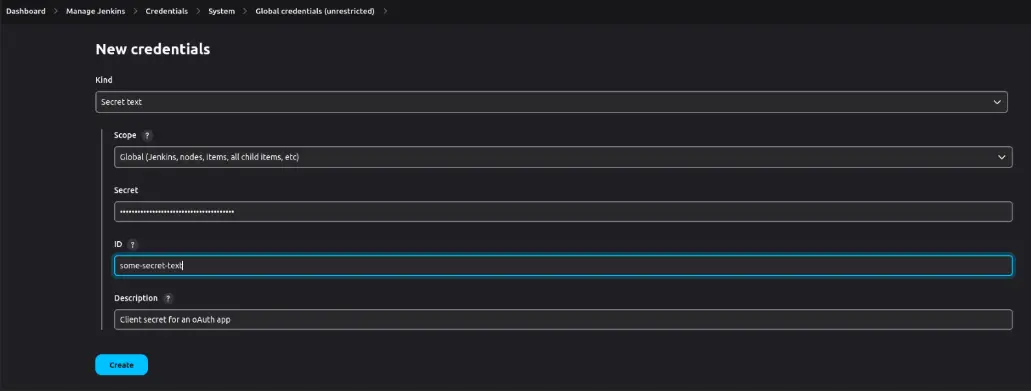
Text-based secrets like an OAth client secret
In case of. env holding environment variables which need multiple steps to build pipelines
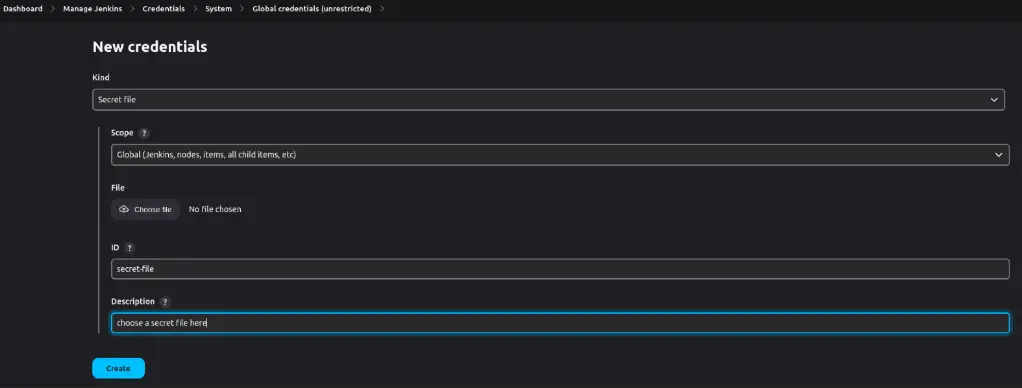
This is where the “Credentials Binding” plugin becomes essential. This plugin enables you to associate secrets with environment variables, thus ensuring their availability to your build scripts.
It simplifies the process of bundling all a job’s secret files and passwords, making them accessible through a single environment variable during the build.
To leverage this plugin, you must specify the ID of the secret you wish to utilize and indicate the environment variable to which it should be bound.
The following example is designed for a freestyle project in Jenkins.

Example for injecting the credentials PORT into a pipeline project in Jenkins
How to use third-party secret management tools in Jenkins?
Beyond relying solely on the native Jenkins Secrets manager, there’s the option to seamlessly integrate with third-party secret management tools like HashiCorp Vault, AWS KMS, and more.
This integration proves especially advantageous if you’re already employing tools like Vault for managing secrets across other applications or services.
Start your Vault using the provided command and ensure that this terminal session remains active. It’s worth noting that dev servers run in-memory, meaning that turning them off would result in the loss of all data.
$ vault server -dev -dev-listen-address="<private ip of ec2>:8082"
Now run the command in a separate terminal session
$ export VAULT_ADDR=http://<private ip of ec2>:8082
# Check the status just to be sure
$ vault status
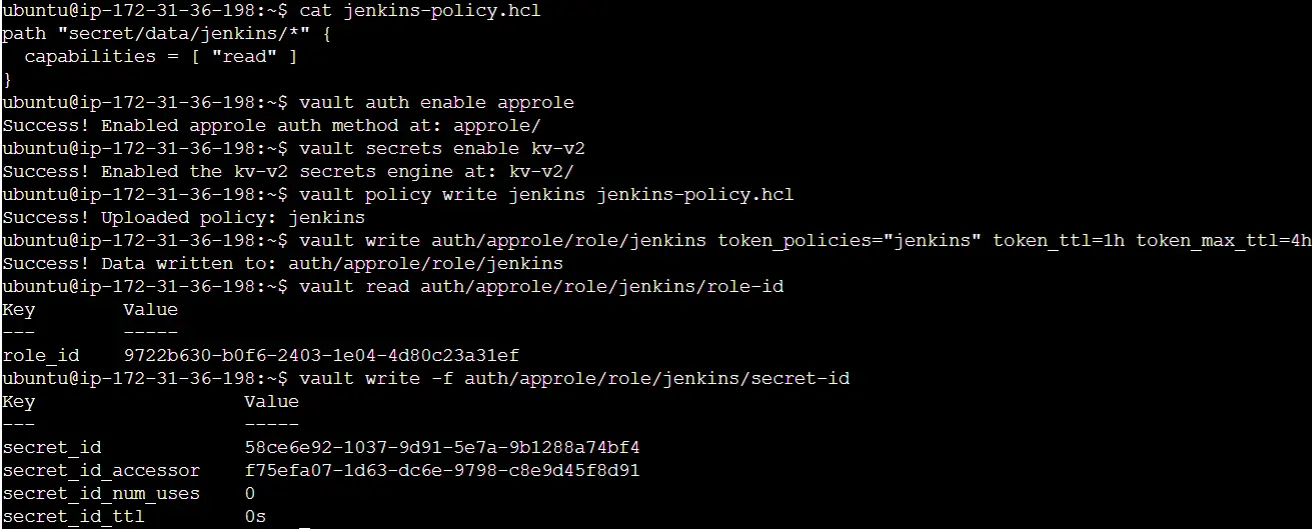
To enable communication between your Jenkins instance and Vault, the following commands will handle the necessary authentication processes. Jenkins will subsequently utilize this role to establish communication with Vault.

These commands are designed to facilitate the connection between applications or services, such as Jenkins, and Vault. The defined access policy permits access to the path “secret/data/jenkins/*” by the policyholder. Subsequently, this policy is registered with Vault, and a role is associated with this policy.
Make sure to copy and securely store the “role_id” and “secret_id” for future use. These identifiers are what Jenkins will utilize to authenticate itself when communicating with Vault and accessing secrets within the “secret/data/jenkins/*” path. You will save these as credentials within Jenkins for secure access.
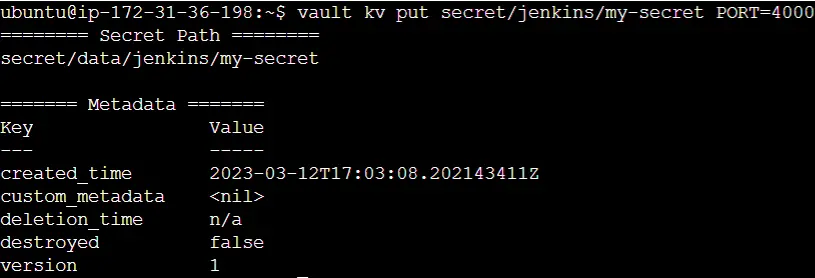
To complete the setup on Vault’s side, we must store the secret. While there are multiple approaches, in this case, we’ll store it as a secret text. The following command is employed to store a secret named “my-secret” within the kv secret engine, using the path we previously defined in the approle policy.
vault kv put secret/data/jenkins/my-secret PORT=4000
Next, create credentials in Jenkins through the Jenkins web interface. To accomplish this, follow these steps:
Go to the “Credentials” page within the Jenkins settings.
Add a new credential under Global credentials.
Choose “Vault App Role Credential” as the “Kind.”
Paste the previously copied “role” and “secret” IDs from the terminal into the respective fields.
The form should resemble the following configuration.
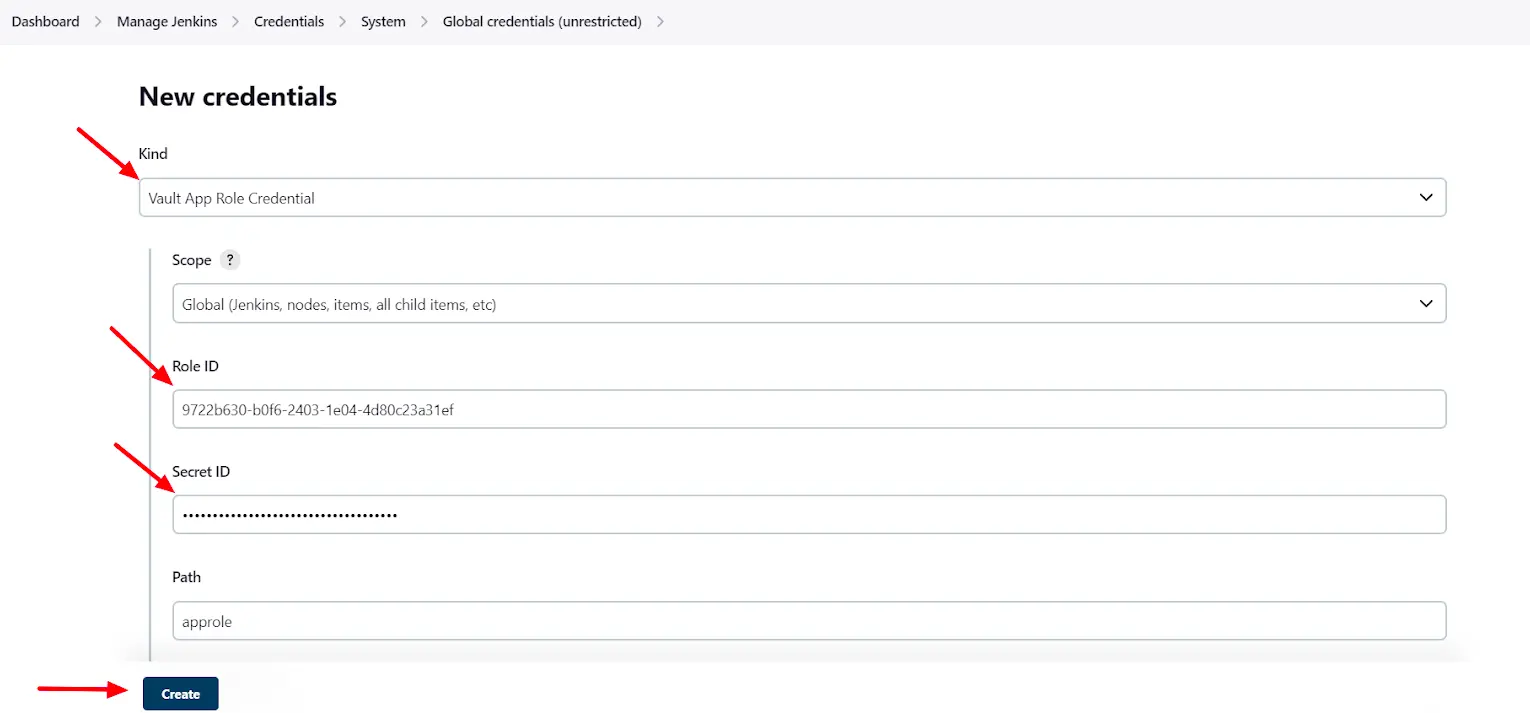
After adding the credentials, be sure to copy the credential’s ID for future reference within the Jenkins pipeline.
To illustrate, the following example is tailored for a pipeline project in Jenkins.
def secrets = [
  [
    path: 'secret/data/jenkins/my-secret',
    engineVersion: 2,
    secretValues: [
      [envVar: 'PORT', vaultKey: 'PORT']
    ]
  ],
]

def configuration = [
  vaultUrl: 'http://172.31.36.198:8082',
  vaultCredentialId: 'ccc2cf0c-1b1a-40a1-a7bd-81ef1dc764f1',
  engineVersion: 2
]

pipeline {
  // ...
  stages {
    // ...
    stage('Building Docker Image') {
      steps {
        script {
          withVault([configuration: configuration, vaultSecrets: secrets]) {
            dockerImage = docker.build("$registry:$BUILD_NUMBER", "--build-arg PORT=${env.PORT} .")
          }
        }
      }
    }
    // ...
  }
  // ...
}
In this section, we have provided a comprehensive guide on integrating Jenkins with HashiCorp Vault to establish a secure method for managing your secrets. This collaboration harnesses Vault’s robust secret management capabilities alongside Jenkins’ adaptable pipeline configuration, ensuring the safeguarding of your sensitive information throughout the entire CI/CD process.
How can you manage secrets in Jenkins?
Effective secrets management in Jenkins is an essential component for upholding the security of your applications. To achieve this, adhering to best practices is imperative.
These practices encompass regular secret rotation, the use of robust passwords, and the avoidance of storing plaintext secrets either within Jenkins or in version control.
Furthermore, continuous auditing and monitoring of secrets are vital. This entails monitoring access to secrets, tracking their usage, and promptly updating them when necessary.
The establishment of alerts to notify of potential breaches, such as unauthorized access to secrets or failed login attempts, is also a critical aspect of secrets management.
In the event of a security breach or secrets leakage, having a well-defined plan in place is essential.
This plan should include the revocation of access to compromised secrets, the rotation of all secrets, and a thorough investigation to prevent similar incidents in the future.
Summing up
In Conclusion As demonstrated, Jenkins secrets play a pivotal role in storing sensitive information like passwords, tokens, and keys that are indispensable for the proper functioning of your applications.
However, if not handled with care, these secrets can pose a significant security risk.
Throughout this blog post, we have underscored the significance of secrets management in Jenkins, highlighted the types of secrets that can be managed, and outlined best practices for securing and effectively managing these secrets.
Additionally, we’ve provided step-by-step guidance for setting up and configuring secrets in Jenkins, both natively and with the assistance of external secrets management solutions.
It is essential to bear in mind that hard-coding secrets or storing them in plaintext can lead to security vulnerabilities. Thus, adhering to best practices for secret management and having a well-prepared strategy for dealing with potential breaches is paramount.


