Nginx is a lightweight, open-source, robust, high-performance HTTP server and a reverse proxy. It’s the most popular web server, beating Apache and IIS.
Nginx is recognized for its stability, performance, rich feature set, easy configuration, and low resource consumption.
While the default configurations are favoured by most people, they are not secure enough, and extra tweaks are needed to reinforce the web server.
Top 7 methods for Nginx hardening
Here, we will look into some actions you can take to strengthen and improve Nginx server security.
1. Disable Any Unwanted Modules
While installing Nginx, in default it includes many modules. Currently, we cannot choose modules at runtime. To disable specific modules, you need to recompile Nginx.
It is advised to disable any modules that are not used as this will decrease the risk of potential attacks by limiting operations.
2. Implement SSL Certificate
The primary and essential step in strengthening your Nginx server security is to include an additional layer of protection using an SSL certificate.
The SSL certificate is a digital certificate powered by cryptography that encrypts data traffic between your web server and the web browser. SSL certificate also forces your website to use the secure HTTPS protocol over HTTP, which transmits traffic in plain text.
You can make use of Let’s Encrypt SSL which is free or any certificate according to your preference. There are two additional settings that should be taken care of after you implement a SSL certificate.
Disable weak SSL/TLS protocols
Implementing SSL does not imply that your site is secure. Deprecated versions of SSL such as TLS 1.0, TLS 1.1 are identified as weak, and these protocols are inclined to SSL and TLS vulnerabilities such as POODLE, BEAST, and CRIME.
The most commonly used web browsers like Chrome, Firefox, Safari and Edge no longer support TLS 1.0 and TLS 1.1.
To implement TLS 1.2 and TLS 1.3, we have to edit two configuration files:
/etc/nginx/nginx.conf
/etc/nginx/sites-available/default
Locate the following line in nginx.conf file
ssl_protocols TLSv1 TLSv1.1 TLSv1.2; # Dropping SSLv3, ref: POODLE
And, remove TLS versions 1 and 1.1 and add TLS 1.3
ssl_protocols TLSv1.2 TLSv1.3; # Dropping SSLv3, ref: POODLE
However, obsolete protocols also may be present in your Nginx server block configuration files. The block configuration files are in the directory /etc/nginx/sites-available/.
Therefore, continue and change your block configuration file as before.
Find the following line
ssl_protocols TLSv1 TLSv1.1 TLSv1.2;
As before, delete the TLSv1 and TLSv1.1 protocol and add the TLSv1.3.
ssl_protocols TLSv1.2 TLSv1.3;
Disable weak cipher suites
Weak cipher suites may lead to vulnerabilities, and as a secure practice, we must make sure that only strong ciphers are allowed.
Add the following to the server block in the ssl.conf file
ssl_ciphers "HIGH:EECDH+AESGCM:EDH+AESGCM:AES256+EECDH:AES256+EDH:!aNULL:!MD5:!RC4";
3. Exclude Server Headers
The default state of a Nginx server returns something like Server: nginx/1.12.1 in the server response or error pages. The best method is to remove the header completely. For that, we require the installation of nginx-extras.
For Debian/Ubuntu
sudo apt-get install nginx-extras
For RHEL
yum install nginx-plus-module-headers-more
After installing and restarting the Nginx service, add the following lines to your nginx.conf file.
        # /etc/nginx/nginx.conf
        http {
            # Basic Settings
            more_set_headers 'Server: ';
If no value is specified, the header will be displayed empty. We can also create custom headers as given below.
        # /etc/nginx/nginx.conf
        http {
            # Basic Settings
            more_set_headers 'Server: Custom Header';
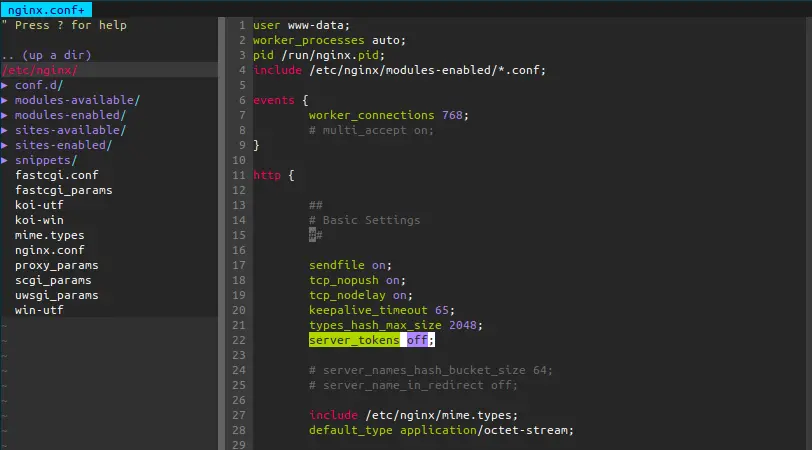
To completely disable the server header, find server_token in the Nginx configuration file and set it to server_tokens off (by removing # in the nginx.conf file).

4. Resource Control
To counter potential DoS attacks on Nginx it’s possible to set buffer size restrictions for all the clients.
These settings also prevent any potential buffer overflow attacks.
Adding the below lines to the nginx.conf file will prevent any such attack.
        ##buffer policy
        client_body_buffer_size 1K;
        client_header_buffer_size 1k;
        client_max_body_size 1k;
        large_client_header_buffers 2 1k;
        ##end buffer policy
5. Disable unsafe HTTP methods
Another sound practice for hardening Nginx server is to disable unsafe HTTP methods. Most of the time, GET, HEAD & POST methods are only used. Allowing TRACE or DELETE is unsafe as it can lead to attacks such as cross-site tracking.
The line below will only permit GET, POST, and HEAD methods and exclude all the other methods including TRACE and DELETE.
Modify nginx.conf and add the following under server block
        if ($request_method !~ ^(GET|HEAD|POST)$ )
        {
        return 405;s
        }
6. Configure Security Headers
For further Nginx hardening, you can add several different HTTP security headers to the server. These HTTP security headers tell the browser how to behave while handling the website content.
I happened to cover an in-depth blog on how you can harden server security by implementing security headers.
Configure and monitor Nginx Logs
Nginx access logs and error logs are enabled by default and are found in logs/error.log and logs/access.log.
We can also specify the logs to be recorded according to their severity level.
Continuously monitoring the Nginx log gives you a better understanding of requests made to your Nginx web server and also helps you to notice any encountered errors. This helps in discovering any attack attempts and also helps in identifying what you should do to optimize the server performance.
7. Update Nginx Server Regularly
Maintaining your web server up to date is mandatory in order to ensure Nginx server security.
Updating the server on time applies the patches that will address pre-existing vulnerabilities. If left ignored, they can be exploited to compromise your server.
Other than that, several performance enhancements, security fixes, and new features are also being added regularly with every update.
Conclusion
I believe I’ve covered all the fundamental actions that you can take to harden your Nginx web server. Leaving the server in default configuration is not a secure practice to follow and what we neglect as a low risk might become a possible threat in the future.
If you have any thoughts on Nginx server security or would like to ask me a question regarding it, please feel free to leave a comment below. I’d love to help you out!


